Mista Lista: September Aha’s and Ta Da’s

Now that the KaZoos have made almost all of the small and affordable repairs and improvements they can at this juncture (except for a few things needing to wait until cooler weather later this fall), Mista Lista will only be sharing seasonal updates on their home improvement progress.  These home improvement to do/ta da posts will come at the end of November, February, May, and August.  Not to worry, though: Mista Lista will be sharing other to do and ta da posts that focus specifically on certain projects that are receiving some KaZoo love in the interim months.  Let’s get this party started!

September Aha’s and Ta Da’s:

Receding Yard Uglies
Our neighborhood HOA has a policy (not always well-enforced) that air conditioning units and trash cans should not be seen from the road, and while some people may not follow this policy, we happen to like hiding the yard uglies.  My parents gave us a leftover lattice screen to hide our trashcan, and we bought another lattice screen to hide our AC for $17.13 (on sale at Lowe’s end of summer clearance sale).  We also put down 9 red square patio stones ($7.83 also on summer clearance) underneath our trashcan, since the grass underneath it was dying from lack of sunlight anyway.  We dug down the area so that the patio stones would be level with the ground for easily rolling the trashcan into place behind the lattice. Now if we could just hide the ugly meter in a way that would still allow it to be read….

IMG_3215

Reorganized Garage
Once the KaZoos started some of the more involved projects like installing the range hood, they realized that they needed a location to organize everything for their current and upcoming projects.  After putting away some clutter that had accumulated on various shelves in the garage, they designated one shelf as their DIY project shelf.  This shelf holds all the smaller items they are/will be using for projects, grouped by project, and sequenced by order of project.  Although one shelf may not seem like very much room for all of their DIY needs, this is one way the KaZoos are keeping their to do list manageable for the future.  Plus, now Mr. KaZoo can fit his car in the garage where all of those things were taking up valuable car real estate. Mista Lista applauds the KaZoo family’s efforts to minimize clutter and maximize efficiency.

IMG_3208

Remixed Office/Living Room
When Mrs. KaZoo first arrived from the big city, her home office was set up in the front bedroom where she would be encouraged to work by the abundant natural light.  Mrs. KaZoo knows she works best in natural light in an open, minimalist space free of distractions, and the front bedroom offered a nice picture window on the north side of the house.  Plus, this would make the front bedroom seem like less of a space-waster if it could double as an office.  Unfortunately, the cramped space in the front bedroom was cramping her thinking.  Keeping the draperies open on the picture window allowed plenty of light but also plenty of heat,  not to mention the constant distraction of neighbors passing by the window while she was working.

At the same time, the KaZoos were feeling frustrated with their living room arrangement because they could not sit on their favorite couch to watch TV, due to the size limitations of the room rendering it impossible to have the media stand opposite the sofa.  Plus, the living room was feeling very crowded with its oversized furniture awaiting a neighborhood garage sale in October.

Mrs. KaZoo had an “aha” moment when she realized that the KaZoos could swap out some furniture with existing pieces in other rooms to solve both the living room and office dilemmas.  When Mr. KaZoo came home from work one evening, they shifted the TV to a smaller TV stand, relegating the larger media stand to the front bedroom for media storage.   The smaller TV stand fit on a smaller wall in the living room, allowing the sofa to occupy the longest wall opposite the TV.

 IMG_3209

By putting the TV on the smallest living room wall instead of a bulky loveseat and moving a French chest to a different wall beside the piano, the angled wall was freed up for Mrs. KaZoo’s displaced desk.

 IMG_3214-2

Now, both desks are in the living room area (making for a more functional office space), the KaZoos can watch TV from their comfy couch, and the front bedroom still serves a valuable double purpose as book and media storage in addition to a guest room.  Having a media stand in that bedroom also provides a flat surface for guests’ suitcases, and we can eventually put a TV in that room if we so choose.  Three birds with one stone, fools.  That’s what Mista Lista calls efficiency.

Re-Mastered Closet
For under $100, the KaZoos completely redid their master bedroom closet, maximizing storage by reusing existing shelving from the garage.  See these posts for other details: Part I, Part II, & Part III.

IMG_3203Here’s the cost breakdown:

  • 1 can Sherwin Williams Harmony paint in Sea Salt = $31.79 (on sale)
  • 4 packs of Rubbermaid fastset back clamps = $7.24 (on sale)
  • 3 Rubbermaid 12 inch support brackets = $7.62 (on sale)
  • 1 pack of Rubbermaid c-clamps = $6.20 (on sale)
  • 3 Rubbermaid wall end brackets = $3.28 (on sale)

TOTAL PROJECT COST: $56.13

Not too shabby, eh?

You may have noticed that there are only ta da’s here and no to do’s.  Say what?! Mista Lista and the KaZoo family have decided to set monthly project goals, so tomorrow Mista Lista will be back sharing the KaZoo To Do list for October.

Master Closet Part III: Remix

In last week’s great purge of our master bedroom closet, we cleared out our closet in order to scrape ceilings, paint walls, rip out carpet, and add more racks for storage, using leftover wire shelving from our garage that we took down to make room for paddle board racks.  Chris also attempted to put on pants from high school. Spoiler alert: They didn’t fit.

We painted the walls before doing anything else (usually we wouldn’t), primarily because the taller KaZoo was on work-related travel, and the shorter KaZoo couldn’t reach the ceiling well enough to handle the scrape, patch, sand, prime, and paint all by herself. When Mr. KaZoo left, the closet looked like this:

MasterCloset

When he returned, he found the closet looking like this:

 IMG_3197

Then we combined forces to tackle the ceiling.  Our usual prepwork involves removing the carpet, tarping off things we don’t want covered in dust, and then scraping the ceiling, but this time, we used the carpet as a floor tarp to catch all of the popcorn debris raining down since the carpet was going to be leaving anyway.  I don’t recommend this unless you like slogging through a sea of popcorn ceiling and shag carpet while covered in drywall dust.    We first tried the dry-method of popcorn removal–simply scraping away at it.  Although this method resulted in fewer scratches and fuzzy places in the drywall, it was also considerably more tedious than the wet method we have used in the past.  We normally use one of those garden sprayers, but ours had recently been used for weed killer, so we just used a regular spray bottle filled with water to mist the ceiling, rather than gassing ourselves in the closet.  After waiting a few minutes for the water to saturate the popcorn, it came off in nice, soggy strips, rather than little chippy dry sections.2014-09-25 14.42.49

We brushed everything down to get rid of residual dust on the ceiling surface, applied joint compound to areas needing to be smoother, and let that dry overnight.  The next day, we sanded, brushed, and sponged everything down (again), after which we ripped out the carpet.
2014-09-26 12.38.48

After vacuuming up the residual dust and debris, we were ready to paint the ceiling.  We decided to paint the ceiling the same color as the walls (Sherwin Williams Sea Salt) for three reasons (a) We have plenty of it. (b) It is not the typical white. (c) It is light enough to not make the closet feel like it is caving in on us while trying to find clothes in the morning.


2014-09-26 19.08.53

While waiting for the painted ceiling to dry, we measured and cut the extra wire racks we removed from the garage to be the sizes we needed for the closet.  Then we forged ahead to installing the racks.  This was a tedious process that took the form of this cycle:

  1. Chris holds rack while Amy marks one spot for height and width of crevice between wires for wall bracket.
  2. Amy uses level to measure and mark all spots for back wall brackets and side brackets.
  3. Chris drills holes for all back and side brackets.
  4. Amy and Chris hammer in the anchors and nail-ish things (we like to use the technical language for things around here, in case you haven’t noticed).  The instructions said to tap gently, but the long wall had extra plywood backing that meant we had to break out our steel-driving John Henry skills.  We’re fairly certain we woke up the neighbor’s baby doing this, which means our neighbors probably had a great Friday night. Except not at all.  
  5. Amy and Chris snap wire rack into place and set into side wall bracket.
  6. Chris adds C-clamps for maximum support, using a manual screwdriver.  The directions said to use 1 1/2 inch screws.  This was a total impossibility, and we ended up using 1 1/4 inch screws instead, with much more success.
  7. Amy holds support arm brackets in place while Chris drills holes, taps in anchor, and hammers in the nail-ish things.
  8. Repeat four times.

After installation of all the racks, I sponge-washed the walls to get rid of residual dust from the drilling and vacuumed the baseboards and floor.  Once we installed the racks in their new location, the closet started looking less like a secret safe room and more like an actual closet.  Of course, adding clothes back in the closet helped with that, too.

To plan the new location of our racks (and determine the measurements for our cuts), we inventoried how many categories of clothing items we had (i.e., how many skirts, pants, shirts, dresses, etc.) and decided where it would be best to hang the respective categories.   We decided to do two long racks (keeping the existing long rack plus a new long rack cut from the garage shelving), one for each of us to hang our shirts and pants.

IMG_3198

With the residual section of the garage rack, we made another short shelf/rack for my shorts and knee length skirts to hang opposite the long wall.  We trimmed an existing closet rack to fit the same wall for my long skirts and capri pants.
IMG_3201

We decided that a galley-like closet arrangement was more functional than the previous corner system that rendered part of each shelf useless for hanging items where they t-boned into each other.  Plus, this provides easier access to the outlet and gives us a nice path for a runner rug.  Not that room for a rug was a major part of our planning and decision making, but having a rug over the concrete floors (until we get our wood-look porcelain tile) definitely softens things up a bit underfoot.

IMG_3204

The mid-sized existing rack we raised a few inches to allow for long dress and suit storage for both of us, storage for my purses, and room for Chris’s shoes.
IMG_3200

While cutting the shelving, Chris noticed that the garage wire racks weren’t the same kind of rack as the ones already in our closet: They didn’t have the clothing “bar” at the bottom.  Aesthetically, we thought it may not look the best, but after install, it is barely noticeable and is actually a functional improvement in some ways because the divided sections keep you from cramming too many clothes in one location..  Plus, if we upgrade to a real closet system down the road, we only have to live with the mismatch for awhile. Given my perfectionistic, OCD tendencies, I really thought it would bother me more than it does.  Maybe I’m too short to really see the top rack, so I don’t notice the difference.IMG_3198


I hung my flip-flop shoe organizer back over the door, and we mounted our coat rack behind the door to hold hats and scarves.
IMG_3199

On the left wall (as you enter the closet), we brought the 3 x 3 Cherry Cubeical back, which is currently holding my swimsuits, swimsuit cover ups, board shorts, work shorts, and work pants.

IMG_3206

Note: The purple labels hanging on the blue handles differentiate my ocean swimsuits from my pool suits.  This may seem ridiculous to some of you, but if you have ever had a home with a pool, this may make some sense to you.  Basically, if you wear a swimsuit in the ocean and then wear it again to swim in a pool, you can introduce algae to that pool, and algae (especially some kinds) are hard to eliminate from a pool.  If you wash your swimsuit in hot water every time you swim in the ocean before swimming in a pool to “kill” living organisms, there still may be some algae stuck to it (especially if you have a lined swimsuit), and your swimsuit may now be faded and ill-fitting. A simple rinse of your suit between ocean and pool or showering in your swimsuit between venues does not suffice. Since I frequent both the pool and the ocean, I handwash my suits after wearing them and choose to keep two different sets of suits to avoid the risk of contamination.  

The middle sections of the Cubeical are currently empty (!), but I’m sure they’ll be filled soon, too.  We also added some interest to the wall in the form of a pinboard with a coral motif, a panoramic photograph of Neyland Stadium, and Chris’s diploma (because where do you hang those if you don’t have a dedicated home office or man cave)?  My diplomas aren’t framed, so they don’t get a place of honor in the closet like his does.  Maybe someday I’ll get around to framing my first two diplomas.  Probably about the time I frame my third and final one. Which could be never at the rate my dissertation is going.

Eventually we plan to upgrade the light fixture from its mushroom-like state, add the wood-look tile I mentioned earlier, and install a real closet system, perhaps with some additional shelf lighting to help with visibility.  For now, our under $100 fix will work just fine.

Organizing Clothing:

IMG_3202

For Chris’s clothes, organizing was simply a matter of hanging his shirts from dressy to casual, followed by his pants, also from dressy to casual. My clothes required a little more work, and I organized them in a slightly unconventional way.  I typically sort by kind of article and keep like with like: dresses with dresses, shorts with shorts, etc.  For shirts, I normally vacillate between organizing by color and by category (business casual, casual) as the primary category, followed by type (sleeveless, short sleeve, 3/4 sleeve, long sleeve).  On the one hand, I like organizing by color because there is just something harmonious about color continuity that I prefer, but I keep wearing the same tops over and over because I know how to pair them with other things to make outfits, rendering much of my wardrobe useless.  On the other hand, organizing by category shows me more options for particular occasions, thus increasing the likelihood I try wearing something different than usual, but walking into the closet is a visual jarring experience that makes selecting anything difficult.  When re-doing this closet, I decided to analyze my clothing pitfalls and use that to come up with a happy medium.

I frequently find myself stuck in three kinds of clothing ruts: (1) I wear the same tops/outfits over and over. (2) I prefer casual to dressy.  (3) I gravitate to neutrals. After having to conduct my dissertation research out of state and live in a hotel for six weeks, I re-learned the art of capsule wardrobes.  I used to be good at this when traveling internationally.  In high school, I took a small size carry-on for a month in Europe and laughed at all my friends lugging giant Samsonites up nine flights of stairs in Greece. I love the simplicity of capsule wardrobes.  I am a minimalist at heart, so having a closet full of clothes overwhelms me with too many possibilities.  Consequently, I’m planning to start cataloguing outfit ideas, beginning with my neutrals that I love.  Rather than fighting my preference for neutrals, I’m going to use that as the starting point for developing my outfit building skills, essentially building a capsule wardrobe with neutrals as the base.

My neutrals are sorted into three categories: up, up/down, and down, a.k.a. classy, convertible, and comfortable. Up clothes are dressier and more likely to be considered businesswear in a traditional workplace setting.  Items in this category are more likely to closely resemble menswear and/or have an element of elegance about them, such as being made of better material, adding a touch of lace or silk, or creating an interesting neckline or back.   Clothes in this category have a certain feature that makes them seem classy.

I love gray, but I hate gray areas.  The murky gray clothing area is what I call up/down wear, or clothing which can either dress up an outfit or dress it down.  Clothes that could be considered business casual in a less formal work environment or in a trendier/artsy environment fall in this category.  To qualify as an up/down top, the style and cut of shirt is likely based less on menswear and/or may be made of a material that makes it appear more casual.  For example, the blouse on the left is an “up” blouse, but the one on the right is an “up/down” blouse because of the material and style. Note the sleeves of the blouse on the left are nicely cuffed, whereas the sleeves on the right blouse aren’t.  I would wear up/down clothes when I’m wanting to appear put-together, but not necessarily needing to be “polished.” Here, the emphasis is on the versatility of the piece–can it be easily converted from work to play?

Down clothes are items like basic tees and polo shirts–anything that is decidedly more casual or sporty.  That’s not to say I wouldn’t throw a blazer over a tee and turn it into a work outfit (my default, in fact), but the tee itself has a dressed down, at home, casual feel, where comfort is king. This is literally my comfort zone when it comes to clothes.

The rest of my tops are organized by color.  Here at the coast, the weather is warm enough year round that having entire sections of my closet devoted to long sleeves is unnecessary, but because the air temperature can feel cool in the early mornings and evenings, even in summer, having access to all kinds of sleeves year round is essential.  Consequently, I elected not to do the secondary sort I typically do by sleeve length.

We’ll see how “the best of both worlds” turns out.

Master Closet Part II: The Great Purge

Last time we left you in the master bedroom closet, you were probably wondering what we were going to do to solve the builder basic brainteaser.  Our answer?

An at home fashion comedy show.  Seriously.  Well, it would have been serious, were it not for the hilarity resulting from how ill-fitting some of our garments were. The first KaZoo family fashion show was instituted to clear out as much of the unnecessary items languishing in our master closet before moving the remaining garments to the guest room closets in preparation for wire rack removal/addition, ceiling scraping, carpet removal, and painting.

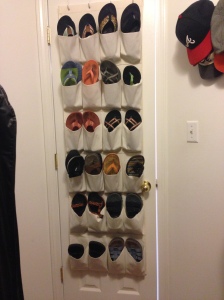
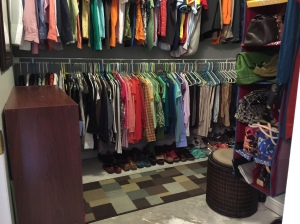
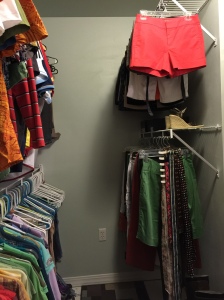
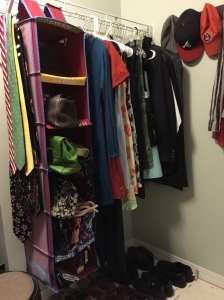
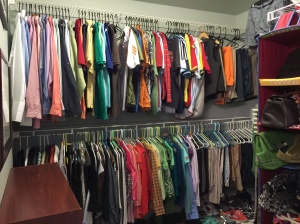
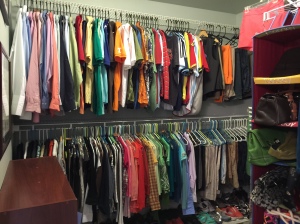
Before the great purge, our closet looked like this:

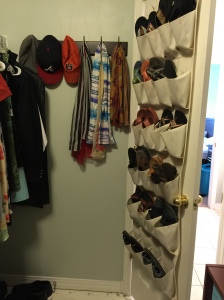
Over the door was where most of my sandals/flip flops lived.  Yes, I have a lot of flip flops.  And shoes period.

IMG_3178

Behind the door was a rack with all of Chris’s shirts, suits, and ties. His shoes lived beneath that rack.

IMG_3177

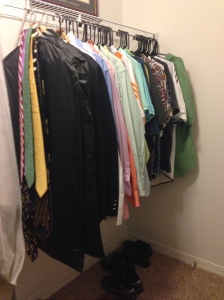
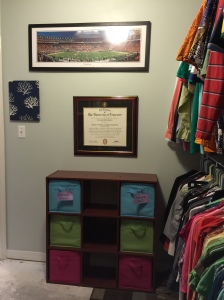
On the left you can see we had some temporary storage for folded clothing and a coat rack for hats and bags.  Along the long wall were the rest of my shoes, most of my clothes, bags and baskets of old t-shirts remnants to be turned into cleaning rags, and some Christmas decorations.IMG_3175

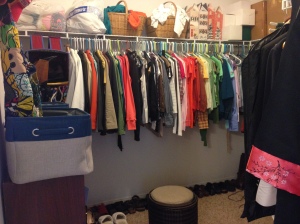
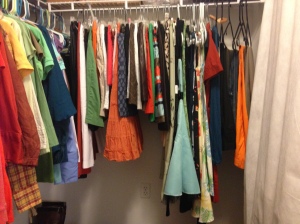
The small back wall held some more of my clothes plus Chris’s pants (and if you look to the far right, you can see a garment bag holding my wedding dress). Still not sure what to do with it.

IMG_3176

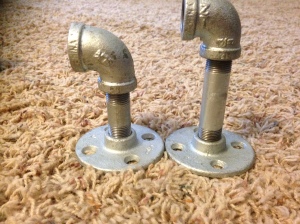
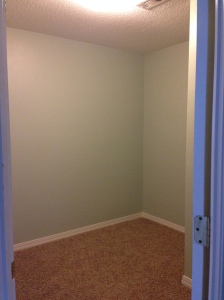
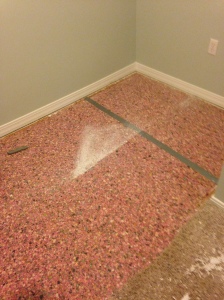
We took out the existing wire racks because they aren’t staying in their current positions for various reasons (see this post for details), although they will reappear in this closet because we can’t afford to upgrade to a nicer closet system at this time.  After patching and sanding a million holes and large gouges in our wall from the anchors, the closet was looking a little better, albeit very sterile.

IMG_3194

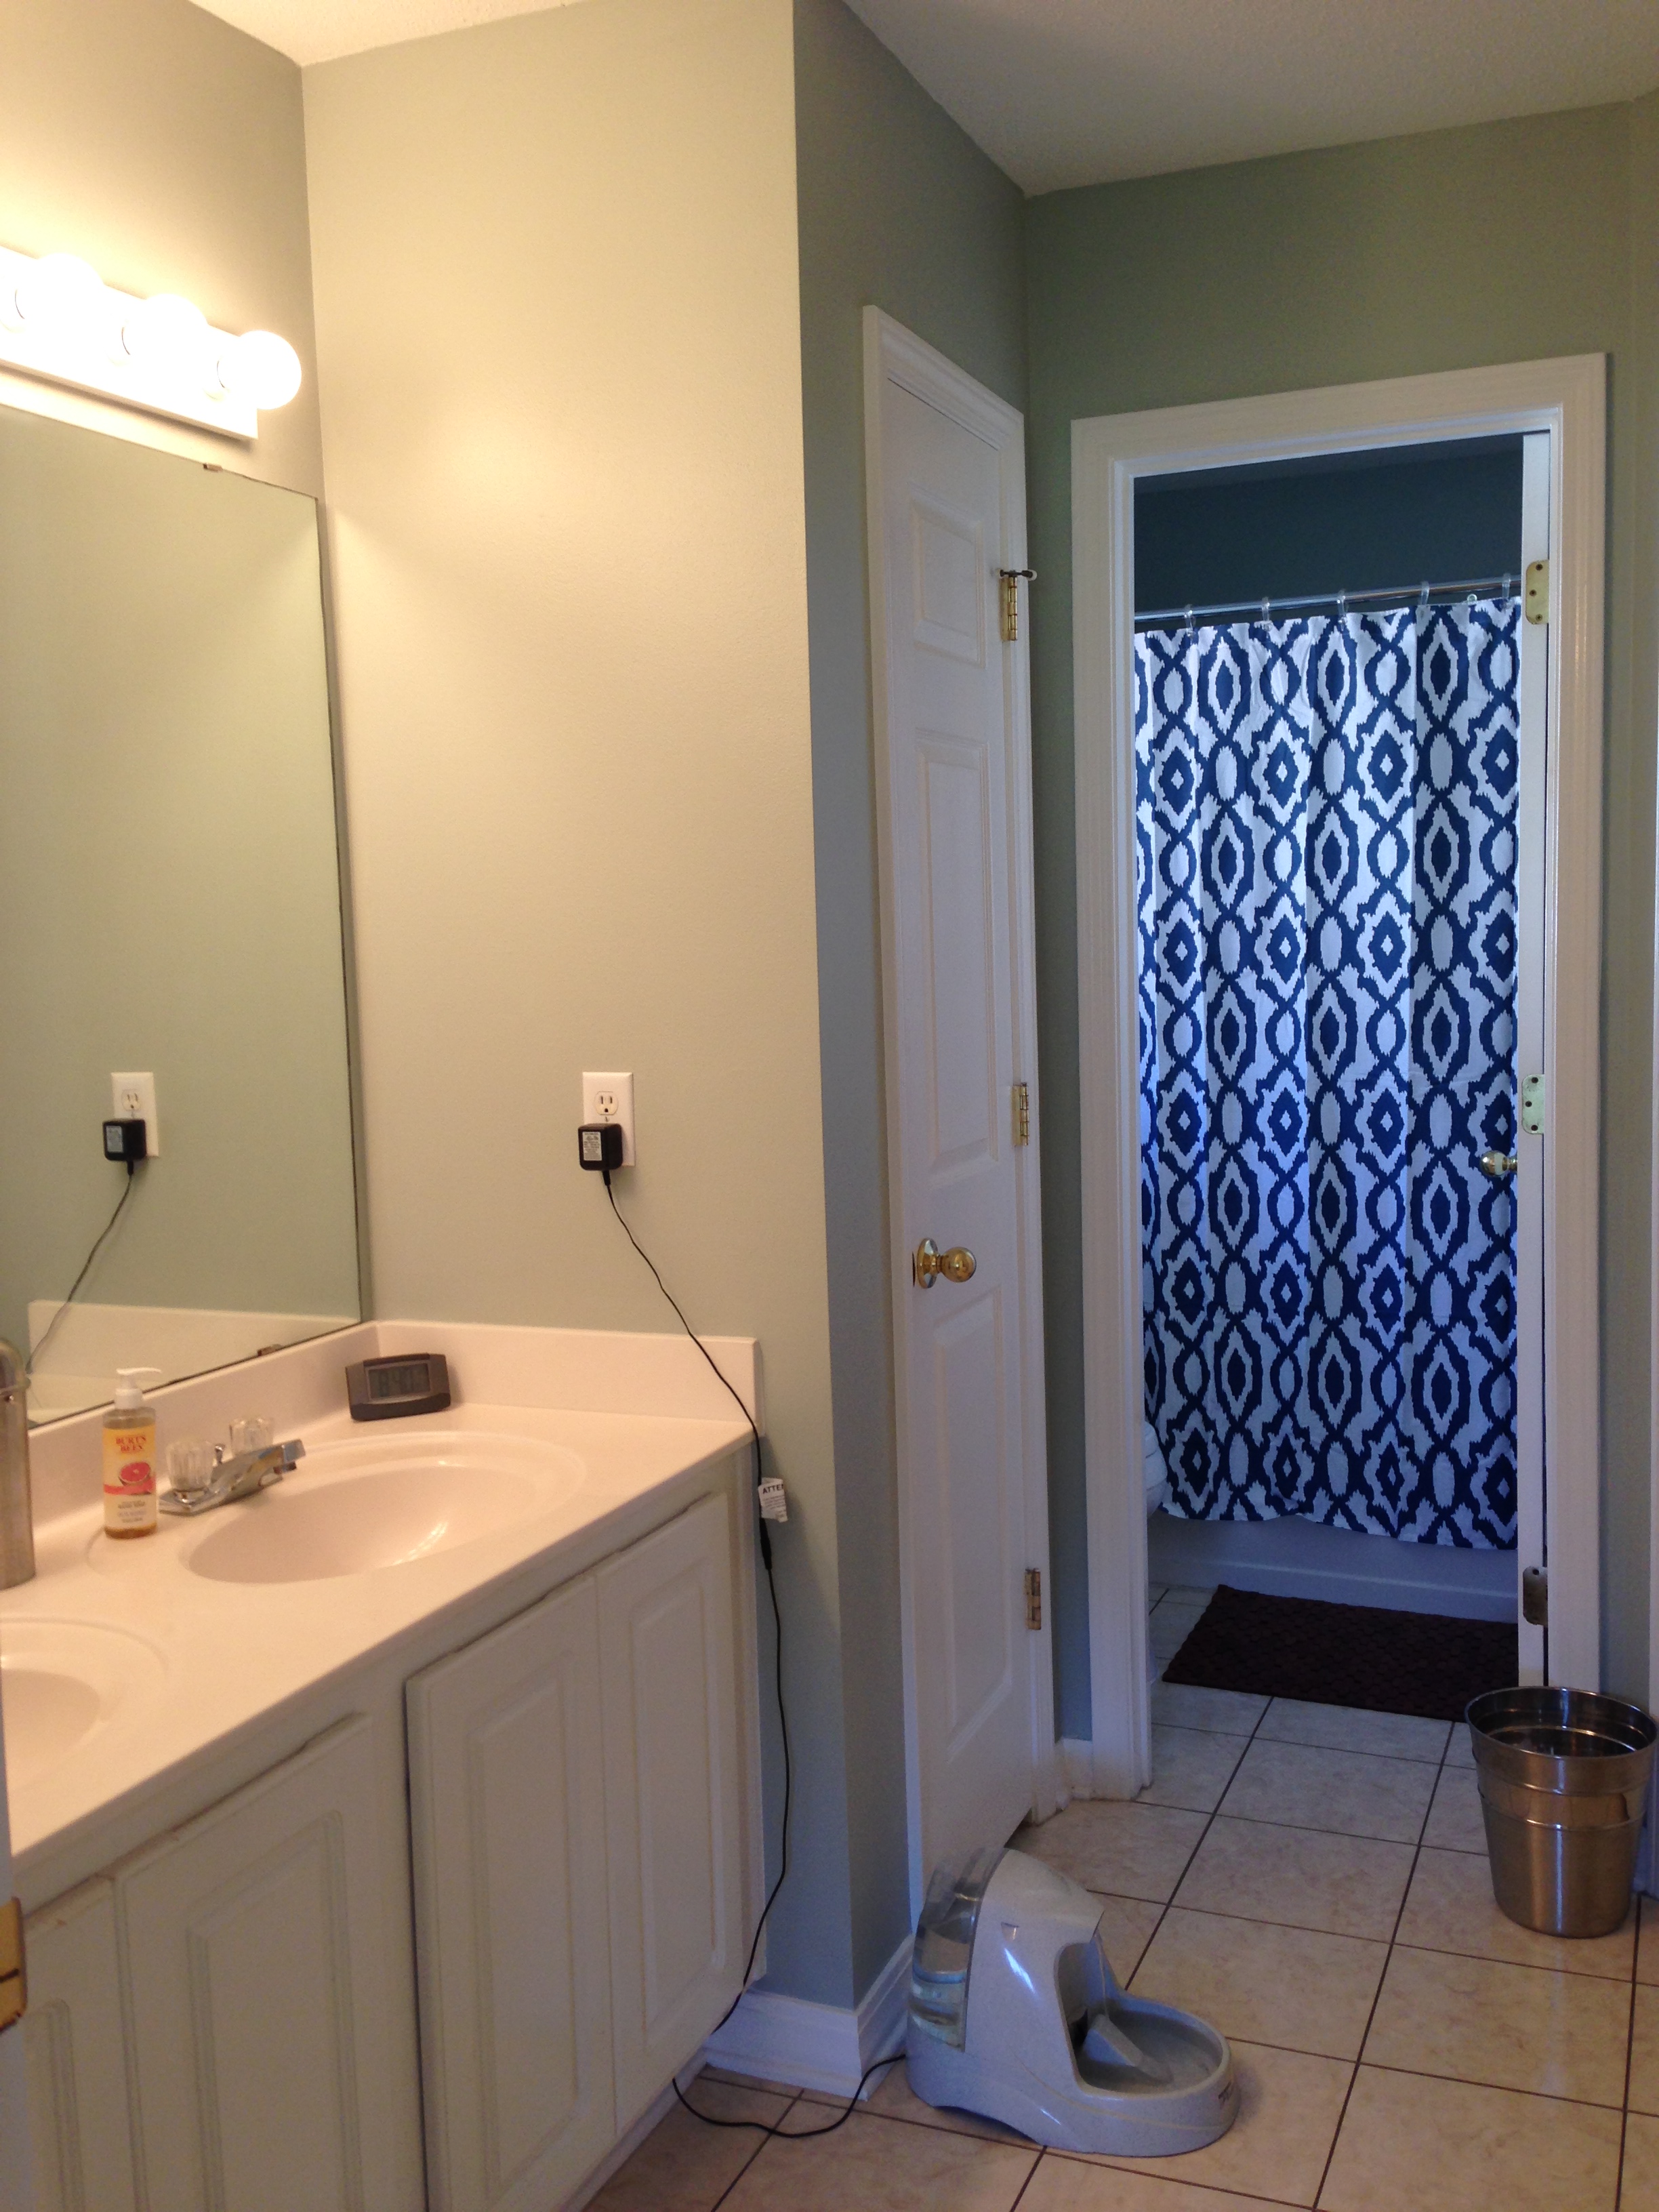
We haven’t scraped the ceilings and removed the carpet yet (today’s task), but some paint on the walls (2 coats of Sherwin Williams Sea Salt) has already made a huge difference in the way the closet looks and feels.  It almost makes the carpet not seem so blah. Almost.

IMG_3197

Now back to how we got the closet emptied for those of you interested in the great purge:

We find it difficult to part with anything in good condition because it seems wasteful, but we remind ourselves that it is more wasteful to keep things that we don’t/can’t use or wear than to pass along these items to someone who actually could use/wear them.  Remember that suit that can’t be let out anymore but has scarcely been worn because you work in a more casual office setting and haven’t had to do a job interview since senior year of college? Someone else could wear that to an interview to get the first job they’ve had in years.  It’s actually more wasteful NOT to think of others when paring down your closet.

There are a number of helpful organizational tips about trimming down closets out there, but here’s what has worked for us:

1.  When in doubt, take it out.
If you haven’t worn something in the last three months, take it out of your closet.  Most people say “in the last year,” but I have a hard time remembering/keeping track of things I’ve worn recently, let alone a year.  The trick where you turn the hanger backwards so you know you’ve worn it?  Doesn’t work if you (a) fold some of your clothes (b) don’t remember to put that exact same shirt back on that exact same hanger or (c) have multiple people putting away laundry who don’t know that the green polo shirt went there originally.

For those of you who need to have seasonal clothing or who are in the maternity phase of life, no need to panic.  The one-season rule of thumb doesn’t mean it’s going to the giveaway pile just yet, it just means that you really can’t be sure that the piece is a significant contributor to your wardrobe yet.

2.  Bare to pare.
Perhaps more men would like organizing if it involved nudity.  Well, a clothing closet purge does, so get excited. Wait, forget I said that.  Strip down, and try on things you’ve taken out of the closet.  Host your own home fashion show and take turns laughing modeling with your spouse.  It’s better if you have at least one other person there to help you decide what to keep in the interest of objectivity. Have you ever noticed that an old, ratty, but super soft t-shirt is like the adult version of a kid’s blankie? You can’t bear to part with it, even if it is past the point of embarrassing/should not be seen in public.  You’ve probably dragged worn it to Starbucks or to the grocery store.  Just sayin’.  Anyway, it’s way more fun to laugh together over the ridiculous state of closet affairs than to laugh at yourself in the mirror alone, which will likely lead to a chocolate eating binge.  And more ill-fitting clothes.  And more depression.  Break the vicious cycle with a friend, folks.

How do you know if it’s a keeper? At this stage in the game, it must meet two or more of these three criteria:

1.   You like it.
2.  It looks good on you.
3.  It is in good condition.

Ideally, what stays in your closet meets all three criteria, but we all have things that don’t.  Confidence is just as much a part of your wardrobe as your clothes are.  If there’s a shirt you absolutely love and it’s in good condition, by all means keep it.  Red isn’t exactly one of my best colors (auburn hair), but there’s a red plaid shirt in decent condition hanging in my closet that I absolutely love and have worn every fall for nearly fifteen years.  What can I say, it was well made and still fits well.

If the only criterion it meets is good condition, donate it.

If there’s a shirt you love that used to look good on you but is looking worn, allow yourself five “sentimental saves“–five items that you can keep no matter how horrible your spouse/friend says it is.  But if it is truly horrible, consider recycling it for the sake of your marriage or friendship.  Limiting yourself to five saves helps you prioritize the garments you are keeping purely for sentimental value.  For example, Chris has quite a few of those short sleeve, button up, surfer dude casualwear sport shirts. Yup, that’s the official name for them. Kidding.  Several of them have been worn to death, and most were blue.  He chose to keep his favorite threadbare green one as a sentimental save plus his favorite of the blue ones that was in better condition than the others.

3.  Dare to compare.
Now that you have a hopefully smaller pile of keeps, start comparing the utility, quality, and versatility of particular pieces.  If you have two black skirts that are similar, consider parting with the one that doesn’t look quite as good on you or is made of a cheaper material less likely to last through the years. If you have one white dress shirt and one ivory dress shirt in the same cut, look in the mirror and ask your helper to tell you which looks better on you.  Usually one or the other will look better, depending on your complexion and other features. I’m one of those anomalous people who by all “color/seasonal analysis” recommendations should wear soft/warm white instead of bright/cool white, but anything other than a true white makes me look sallow and sick.  Years ago, when buying my wedding dress, the dress shop manager/owner was completely surprised how much better the bright white dress looked on me, compared to the soft white dress. If you have one colorful pair of shorts that only goes with one shirt and another colorful pair that coordinates nicely with several shirts, consider keeping the more versatile pair and donating the more limited pair.

Once you’ve completed these three steps to closet-paring success, a trip to your local donation center to donate and/or recycle clothes is hopefully in your near future.  Many of these donation centers will recycle garments that are beyond “gently used,” so don’t just chuck these in your trash to sit in a landfill without checking for a recycling drop-off location first.

Once we followed tips/steps 1-3 for Chris, his portion of the closet was looking good.  He ended up with some items relegated to the “everyday/casual” section of the closet that can still be worn to run errands (but not to work), ill-fitting items to donate, and items that looked like moths waged an epic war (and won), which will get recycled.  My favorites were the pair of high school soccer shorts with the elastic so stretched that they would fit a baby elephant (with room to spare) and the cargo pants that wouldn’t make it over his hips.  Quote from Chris: “Do men’s hips spread, too? I can’t help but feeling that I’m wider than I used to be.” Cackle. And yes, they do. 

In my experience, men tend to have a more streamlined wardrobe, possibly because the criteria for acceptable attire are clearer, in my opinion.  Take business casual, for example.  Khaki slacks and a polo shirt. Done.  Need to take it up a notch? Throw a blazer over it. Need to take it up two notches? Swap the polo for a dress shirt and tie.  Day to night for men? Swap that pair of slacks for some jeans, and lose the tie.

Business casual for women has to be the worst gray area imaginable (or the best, depending on your perspective).  I personally hate the gray area of business casual for women because how some women (and workplaces) define business casual varies widely from others.  A lot of advice out there for women tells you to find your personal style and go from there. This could be helpful unless you have eclectic tastes like me, where my fashion style is more mood-driven than anything.  When I was collecting my dissertation data, I wore a variety of business casual, work appropriate attire composed of a limited, capsule-like wardrobe that fit in one suitcase #HotelLiving.  One day I wore a dress shirt with a sweater vest and pin-striped slacks, and one of the male students said I looked like a professional (no doubt thanks to the menswear look I was sporting).  On a different day, I wore a knee-length green skirt with a navy shell and cardigan and was told by my (male) videographer that I looked like a sorority girl.  Men. Fashion. Ugh.

I do have a couple of other considerations for the female wardrobe that can apply equally to the male wardrobe but may be especially helpful to women like me with eclectic tastes, lost in the gray (and potentially stormy) clouds of business casual and gender stereotypes.

Dress to express.
Clothing, like other forms of expression, is also a form of communication.  Unfortunately (or fortunately), communication involves two parties (as evidenced by the two different people described above in my personal anecdotes), so it’s a good idea to consider others when deciding what to wear.  How you dress communicates your values, how you value yourself, and how you want others to value you.  Why was I so disturbed that a small child thought I looked more professional in typical menswear and that an adult male thought I looked like a sorority girl when I wore a skirt? Values, people.  They were projecting their beliefs and values onto me, simply based on what I wore.  People do this no matter what you do or how you dress, but considering other perspectives of your attire may help you gain fresh perspective on being intentional with your wardrobe and what it communicates.

I’m short, relatively fit, and youthful looking, so I can still rock a mini-skirt, right? Not exactly.  Anything that detracts from the primary message I want to communicate is a distraction.  If we are living life on purpose, we should have a purpose for our wardrobe.  Why do people wear suits to a job interview? A put-together outfit communicates a put-together person–likely an asset in any workplace and definitely a key message you want to communicate to prospective employers.  Decide what your primary message is, and dress to express it.  Anything that doesn’t fit your primary message merits additional scrutiny for keep/purge.  For me, a mini-skirt does not effectively communicate my primary message, so it isn’t a part of my wardrobe. If a mini-skirt helps you express your primary message, you may want to think about why, especially if you are in the 30+ category like me.  Just a thought.  

Note that this is about message, not role.  If you are a stay-at-home mom, what message does your clothing communicate? To some people, mom jeans might say you are complacent, sacrificing your personal health and appearance for your cherished family.  If you want to communicate that you put others before yourself, that can be a totally noble primary message, and mom jeans will help you communicate exactly that. I really don’t care that mom jeans are making a comeback on the runway.  They just aren’t part of my aesthetic.  If you wish to communicate that you are an unconventional SAH mom who may spend a lot some of her time in PJ pants but can also rock some skinny jeans on date night with the hubs because you take care of yourself and your family, do it.  I personally can’t wear skinny jeans (gymnast legs), so those of you who can, rock them for me so I can wear them vicariously. Just once.

Simplify to a Suitcase
Have you ever been to the grocery store where a parent was giving their child choices in that overly loud and proud “I’m the best parent ever” voice? “Which apple would you like, sweetie? There’s Gala, Red Delicious, Honeycrisp, Granny Smith, Fuji, Golden Delicious….” The kid can’t make a choice because there are too many options, and you just want to grab your apples and run but can’t because their cart is blocking the entire apple section.  Because this has never happened to anyone in my family.  Ever. Why not ask your kid, “Do you want Gala or Red Delicious today?” Providing fewer options makes decision making easier, both in the produce section at the grocery store and in your closet.

I have been guilty of standing in a stuffed closet with “nothing to wear” except the same old things despite lots of options.  When I was living out of a suitcase for weeks while collecting my dissertation data, I was much happier with fewer but more versatile pieces.  I like the simple life, and a simple wardrobe appeals to me.

Once you have pared down your wardrobe to what you like, looks good, is in condition, and communicates your primary message, pretend like you are going into witness protection with only one suitcase like Sarah Jessica Parker’s character in the movie, Have You Heard about the Morgans?, but perhaps with a bit more sense.  Underwear and a sequined dress will only get you so far.   

What would you take?  Most likely the most versatile pieces in your wardrobe (basic neutrals) plus a few vibrant pieces you love and can’t live without in your new secret life.  Check that each item going into your pretend suitcase works with at least five other items in your suitcase so you can maximize its utility.  For some people, it is hard to choose favorites, so you may need to ask yourself,  What would I definitely not take?  

Items that you definitely wouldn’t take but meet all the other criteria I recommend putting in a basket, bin, or shopping bag somewhere in your closet (or in a different storage area in your house) that is out of sight and/or out of reach.  If you don’t wear these items for a year, give these away, too.

Important: If you live in a climate that requires a vastly different wardrobe for the different seasons, consider trying the suitcase trick, only with two suitcases–a smaller one for lightweight warm weather items, a larger one for bulky cold weather items.  Ideally, you would have versatile pieces in these suitcases that would make the transition between warm and cold, such as having a tank in the summer suitcase than can be paired with a cardigan from the winter suitcase for autumn/spring, so you wouldn’t need a suitcase for each season.

Equally Important: If you are pre-, during-, post-, or in-between maternity mommas, the suitcase trick likely only applies to your regular wardrobe.  If you don’t want to overspend on maternity wear and want to try applying the suitcase trick to limit your maternity wardrobe, consider packing another suitcase with mid- and late-term garments as well as nursing bras and other such items befitting a new or new-again mother.  If having lots of children (and being in various stages of maternity for many years) is part of your life plan, you may consider making your maternity wardrobe your primary wardrobe and packing suitcases with early, mid-, and late- options so that all your bases are covered.

As always, we’re just sharing what is working for us, so feel free to scoff at our system if it doesn’t appeal to you.  Next time we’ll share the rest of the closet redo, including ceiling scraping, carpet removal, shelving installation, and the final result of our closet purge.


Sand & Kleen: Not So Keen

In Friday morning’s post last week, we shared about the Sand & Kleen system that we were super pumped about trying to eliminate (or at least reduce) the amount of drywall dust coating everything in our house post-sanding.  We do a lot of sanding (all small projects, though), so we thought it would be a good investment (mainly because it was on sale).  On Friday night, in anticipation of some weekend warrior sanding action, we started assembling the Sand & Kleen system (yes, super hot date night that was). We thought the system we bought from Amazon was a fairly safe bet, considering the number of favorable reviews, the simplicity of the system, and the inclusion of multiple adapters to connect the filter bucket to your shop vac for power in case the one that should have fit our shop vac didn’t for some reason.

IMG_3170-1

Wrong.  None of the adapters (or any combination thereof) would fit our regular old shop vac (one of the sizes should have fit based on the measurements provided in the product description, but it appeared to be off measurement-wise by a smidge), so this system obviously wasn’t going to work.  We considered ordering a replacement in case we just had a set of defective parts, but we were skeptical that a replacement would be any different if the parts are made in lots.  Plus, the number of mistakes in the instruction/assembly manual did not leave us feeling very confident, my personal favorites being two mistaken substitutions of “now” with the word “not” that drastically affected the meaning of each sentence.  For example, after you complete all steps of the assembly process, the manual says, “You are not ready to use the Sand & Kleen.” What do you mean? I’ve assembled the whole thing, so how am I not ready to use it?!  Presumably, they meant to say, “You are now ready to use the Sand & Kleen,” but they didn’t.  Simple mistakes like that may not concern some people, but if you don’t have someone proofreading your instruction manual, how can we trust the product quality control either?

Bottom line, we disassembled the Sand & Kleen, boxed it back up, and dropped it off Saturday morning at the UPS store to send it back to Amazon.  We normally love Amazon, but there’s been a few purchases of late that have arrived in bad shape–damaged, dysfunctional, and/or not as advertised.  Our last order of Muir Glen organic tomato sauce came with over 2/3 of the cans dented so badly that we couldn’t use our can opener on them. Hopefully this is not a sign of things to come.

So our review of the Sand & Kleen? We can’t really review its functionality, but in terms of its promised versatility and compatibility to work with your existing shop vac, let’s just say, we’re not so keen on the Sand & Kleen.  Hopefully it is something that other people can use successfully, as we think the idea is a great one.  As for us, we’ve had to revert back to the old, dusty way of sanding.  At least wet sanding helps somewhat.

Anyone else having a case of DIYer disappointment these days?

Can Warm/Cool Coexist in Living Room?

Trying to decide which direction to take our living room…we have more things on the warmer side but would like to head towards the cooler side.  Our rug is a more muted coral than the one shown here, but it has to stay in the room, as do the sofa and ottoman.  Everything else can be shuffled around the house.  We like the warm colors for autumn but would like something cooler for other times.  I really love the blue/jade/gold direction, but we have more things in the coral/orange direction.  We aren’t really a fan of the high contrast blue and orange combo but are looking for either a very versatile plan or something that is a happy medium between hot hot hot and cold because this room is our main (and only) sitting/TV watching/game playing/book reading/exercising space (and we spend a lot of time here). Thoughts?
Can Warm/Cool Coexist in Living Room?

Workin’ Hard for/with the Green Stuff

Progress on the range hood and the master closet temporarily stalled because we were waiting for our new awesome DIY tool to arrive: The Sand & Kleen Dustless Drywall Sanding System (and because we both had to travel to different places out of state for our jobs this past week. Jobs = money –> happy new tools).  Yay tools!

IMG_3170-1

Here’s a link to it on Amazon if you are interested in checking it out for yourselves.  Now that the S & K has been added to our arsenal, expect a closet and hood post next week where we test it out in various capacities.

In the meanwhile,  I’ve been doing a part-time gig clearing my parents’ yard and laying sod.  My dad started the project but was called out of state for work before he could get much done (my family members are planes passing in the air apparently), so I picked up where he left off.  Hot, sweaty, dirty work, let me tell you, but my mom compensated me for my time and brought me Chipotle for lunch, so no complaints here.  My mom has a back injury right now, hence why I was called in to take over the sod job.  

I’m a sucker for yard work.  There’s something extremely satisfying about hard, manual labor, especially outside where you can see the fruits of your labor so easily (and quickly).  Plus, it is a great workout involving multiple muscle groups.  One of my neighbors and I recently had a conversation about how we procrastinate from our respective writing work by doing yard work. This conversation obviously occurred while we were both outside not writing. Go figure.  I’ve even started mowing our lawn, leaving just the weed eating to Chris, which is probably good since he’s allergic to grass, and I’m allergic to weeds.

Here’s my best tip for sod laying, courtesy of my mom’s next door neighbor, who worked on a golf course for a number of years and is quite familiar with groundskeeping and sod maintenance:  Use a machete to cut the sod into pieces to fit your yard.  It makes a nice, clean cut, and it’s a great way to take out frustration without being destructive.  My dad has a machete somewhere in his pile o’ tools, but my mom’s neighbor offered me his readily accessible and super sharp machete to use.  So much better than other methods! Sorry, no pictures of me wielding the machete. Sod laying may not be the easiest job, but getting to attack grass with a machete definitely increased the fun factor, which was pretty much zero pre-machete.

Best part? I got to buy a new planter I had been eying at Lowe’s, some purple mums (I like the purple and white ones best) and a new pair of shoes with the money I pocketed for a half-day of some hard but rewarding work.  Good times.  By the time I got back from Lowe’s it was dark, so no pics of the planter and plants.  They will feature in an upcoming (and long overdue) post about the major overhaul of the yards we have undertaken (and is still ongoing) along with some fall updates for the casa, so stay tuned. Happy Friday, everyone!

Mista Lista’s $chool of Finance: Budgeting for Home Improvement

Today the KaZoos are busy working their real jobs, so Mista Lista is here breaking it down, budget-style. Mista Lista usually shares the list of home repairs the KaZoos need to do as well as improvements they want to make, but he pities the fool who doesn’t budget for home improvements.  Here’s how the KaZoos plan out their home improvement budget:

Driveway_View_of_House

1.  Do your research.  Research property values in the neighborhood and surrounding community both present and past.  This helped the KaZoos decide how much to invest in their home to avoid over-improving.  Important questions to answer: What was the original value of your home (and homes nearby)?  What was the peak value? What is the present value?  Are home values expected to increase or decrease in the next few years? What kind of people buy the homes in my neighborhood–young families, pensioners/retired peeps, rising new money-types?

From the KaZoos: Our 1650ish sq-ft home was originally sold for $150k when built in 1999.  In early 2006 at the height of the local real estate market, our home was estimated to be worth $486k, and the house three doors down from us actually sold for $463k in late ’06 right before the bubble burst.  Chris signed up to receive weekly emails updating him of the latest real estate listings in our area–including new listings, newly reduced listings, etc.  Over the last three years, as Chris watched the market in our area, he started noticing that prices seemed to have bottomed out in 2011-2012 and were starting to make a comeback as 2013 progressed.  Chris’s main theory was that the inventory of affordable homes dropped (all the way to ZERO houses at one point) due to fewer homes on the market period. This was a motivating factor in why we decided to buy sooner than anticipated; otherwise, we would be priced out of the area in which we wanted to be.

When we did buy, the three comparison houses from our appraisal were all in our neighborhood, with the last two selling the month before we closed.  A mid 2013 sale went through at ~$247k (same size as ours), and the last two (both larger than ours) closed at $318k and $295k.   Now, homes in our neighborhood are selling for between $280 and $340 (some larger, some smaller; some nicer, some not).  We paid under $200k for our home, which gives us some definite room for improvement (yay!).  Note: In the interest of full disclosure, the sale values came from our property assessor’s website, and value estimates were from Zillow.

2.  Decide on an improvement financial goal, based on your research and your financial situation.  There are plenty of people who tell Mista Lista they don’t care how much they are investing in their home because they are improving it for themselves.  However, anything can happen, so thinking that your current home is your forever home may be overly optimistic.  The KaZoos like to be cautiously optimistic, balancing their ideal home with the realities of the market and the unpredictability of the future.

In other words, just because you’ve got the money to improve doesn’t mean you should, and just because you’ve got room to improve, based on your research, doesn’t mean you should, especially without the money to do so.  Mista Lista likes that the KaZoos do not finance any of their home improvements.  The motto to remember: If you can’t pay cash today, just walk away.

From the KaZoos:We decided on a total financial goal of $70k for home improvements, including everything from major expenses like roof replacement to minor expenses like changing all the outlets and switches to match (the former residents changes all the outlet and switchplates to white, but the outlets and switches themselves are bisque.  Ugh.).  Keep in mind this is a long range budget so don’t be expecting us to drop that chunk of change all at once a la HGTV.  That being said, we are sure that our budget may fluctuate a bit, with savings on some projects and more expenses than estimated on others.  Note: This number does not include portable purchases like furniture, rugs, decorative objects, etc.  We can invest more freely with purchases that we can keep if we ever move to a different ‘Zoo. Is a home equity loan tempting? Absolutely.  Every time Chris mentions it, I decline, though (In my defense, I also decline right after pointing out we could do it…not sure if that is helping ~ Chris).  Yes, it would be nice to have everything upgraded already, but I like not having any debt other than our home mortgage. My family paid cash for everything, including houses.  It can be done. We can do it, too.

3.  Break it down by project.  Mista Lista finds it helpful to take the list of home improvements (divided out by spaces, remember?) and use that to create a new list of “Projects.”  In this stage of planning, Mista Lista likes having broad, encompassing Project categories, where each home improvement can fit under one Project or “parent” category. Mista Lista doesn’t break it down room-by-room, as some projects encompass multiple rooms (seamless floors).

Then Mista Lista divides these projects, based on cost estimation, into three categories as follows:  Under $2k, Between $2k-$5k, and Above $5k.  Once this is done, Mista Lista attributes specific budget amounts to each project, with the total not to exceed the total improvement budget established in step 2.  Budget-wise, Mista Lista finds it is best to start allocating funds to projects that are essential improvements with less financial wiggle room (e.g., roof replacement) and end with projects that are less essential and have more flexibility as your total budget is nearing exhaustion (e.g., landscaping).

From the KaZoos: Our list of projects (and their estimated total cost) is as follows:

Under $2k

  • Paint $800
  • Landscaping/Hardscaping $1700
  • Guest/Hall Bath $1000

Between $2k-$5k

  • Architectural/Design Upgrades $3500

Above $5k

  • Roof Replacement $11000
  • Kitchen $17000
  • Floors $12000
  • Master Bath $8000
  • Sunroom Addition $15000

TOTAL: $70000

To come up with these projects and numbers, we first started with what we knew would be a big expense: The roof.  Then, we considered the needs of the home  in order to stay competitive in today’s market, which meant that a kitchen and master bath upgrade were in order, along with new, upgraded flooring throughout the whole house.  In addition, our smaller square footage can be amplified with the addition of more living space in the form of a sunroom addition; if heated and cooled, this room can be included in our total square feet and add to the value of our home. From there, we considered things that would have the most impact for less money (paint) and boost our home’s curb appeal (landscaping/hardscaping).  We divided the remaining funds between updating the guest/hall bath and making architectural upgrades like crown molding and new lighting in areas not getting a major overhaul.  Paint and lighting can make a huge impact, people.

You may be thinking that we are underestimating the cost of a new kitchen and baths, but remember, we are trying not to over-improve and go from being one of the cheapest homes in the neighborhood to being the most expensive.  For example, we know that the ‘Zoo master bath doesn’t make the best use of space, but there’s not really any room to make a separate two-person soaker tub and walk-in shower like we would ideally love to have without taking away valuable footage from either the master bedroom or master closet.  It also doesn’t make sense to over-improve our bathroom, so we will probably just stick to the tub/shower combo, though we plan to install a much nicer tub and do an awesome tile surround instead of the fiberglass thing we have now. We aren’t planning to make any major structural changes, so we can save quite a bit of money by not having to relocate plumbing and such.

IMG_3101

4.  Allocate savings to your categories of projects, based on your improvement priorities.  Many financial advisors recommend having separate short term and long term savings goals, where short term goals are things like the annual family vacation trip and long term goals are things like saving for kids’ college tuition.  In this case, short term goals are often less expensive items than the long term goals.  But thinking about home improvements only in terms of short term/long term could be problematic, when you really need to be saving for a pricey roof as a short term goal because that thing is ready to cave at any minute.

Of course, some financial advisors would say that having an emergency fund or a home repair fund should adequately address your sagging roof needs.  However, home repair funds are often smaller chunks of your budget than other pressing matters, and what really counts as an emergency?  What if the roof is caving, the car just quit, the toilet stopped working in the kids’ bathroom, and you just lost your job ALL IN THE SAME WEEK?  Murphy’s law, fools.  Most likely, even if you are a saver, you won’t have enough emergency funds saved to replace the roof, the car, and the toilet (paid for in cash, remember?) and make ends meet until you find a new job, which could be months away.

From the KaZoos: Having to pay for a new roof fairly soon after purchasing the ‘Zoo was a tough blow to take, financially.  Thankfully, Chris had been building up our emergency fund, so we had the money available to cover the new roof without having to (a) stop doing other minor improvements and (b) live on beans and rice.  We managed to do this despite having an expensive rent in the city plus Chris’s frequent travel back and forth plus my need for organic produce plus burrito binges at Chipotle.  You can save without it cramping your lifestyle.  You can do it if we can.  2014-08-06 19.08.32

There’s different ways to do this, but we are currently saving for both the kitchen and floors (long range, big budget items) while also chipping away at other goals in smaller, manageable parts like adding towel bars/hooks to both bathrooms, which lack sufficient hanging space for a life where finding space for soggy towels and wet swimsuits is a daily struggle.

Confession from Amy: I was a fanatical Scrooge saver as a wee child; putting my money in the bank and seeing the growing balance was such a good feeling.  Then there came the advent of plastic and electronic statements.  I am a more thoughtful shopper when dealing in cash; I don’t even like debit cards.  If you have a hard time saving when you just get to zap the card, try going cash-only.  My current goal is to only pay cash for purchases at places like Home Goods, Marshall’s, Michaels, etc. so that I minimize the purchasing of non-essentials.  Crazy? Maybe, but it feels good.  Except when there’s a huge line of people frowning at you while you dig for coins in your wallet.  Eh.  They can wait their turn. 😉


Basketcase: Hall Closet Reorganization

When I first joined Chris in the new ‘Zoo, he had not unpacked many boxes, other than what he needed to survive in semi-bachelordom  while I was still in the ‘city.  Once I arrived, I had two weeks to get settled before traveling out of state again for my research, so I quickly unpacked and put things away wherever I could find space.  This resulted in a guest hall closet that looked like this for three months:

IMG_3131

Not so bad, but not so great either.  It stayed relatively neat (other than the looming avalanche of comforters) because it didn’t get much use, other than reaching in for the vacuum cleaner.  We haven’t had guests often enough to merit a fully stocked hotel spa-like closet of linens, and the other items we only use in the cooler months (comforters, board games/puzzles, heated mattress pads, etc.)

Maybe it’s the former teacher in me, but something about back-to-school time starts the organizational cogs turning in my brain.  Although the master bedroom closet was the first on the ‘hit list,’ this guest hall closet promised to be a much faster fix.

The longterm plan for this closet is to convert it to a coat closet.  We have another linen closet, but we don’t have a coat closet right now.  You’re probably thinking, Why would you need a coat closet in a beach house in Florida?, but we do get chilly nights on the beach and lots of rain. We also need a place to store our winter gear for when we travel to colder places to see family and because we do actually get cold weather down here–it even snowed on the beach this past winter!

Right now, it’s serving as a multipurpose closet, which is the worst kind if you are an organizational nut like me who likes thematic storage.  Nevertheless, I tried to organize things a bit better than they previously were, using some baskets and containers that I had emptied after our recent master bedroom closet purge (details to follow in another post!).

IMG_3132
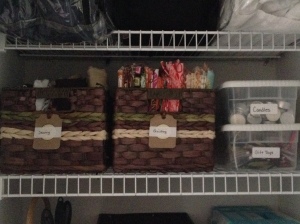
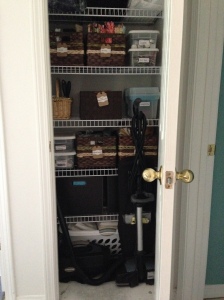
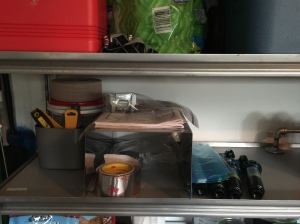
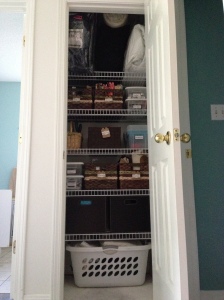
First, I relocated items like the games and puzzles that were occupying prime real estate to the spare bedroom closet.  Working my way up from bottom to top, I used an old laundry basket to store our air mattresses, pump, and sheet sets.  Air mattresses never seem to go back in their original container, and they’re so bulky that I always have a hard time finding a way to store them.  Not anymore.  Now if we have more guests than we have beds, we can simply pull out the whole basket, and everything we need is in one place, just the way I like it.

IMG_3136
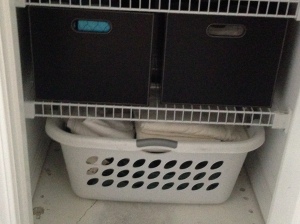
The two larger box-bins hold extra tissue boxes and toilet paper. Because you can never have too much toilet paper. Or tissues, if you have allergies like I do.

The woven baskets hold vacuum accessories, decor not currently in use, and my sewing and quilting fabrics.   The plastic containers hold curtain hardware, electric controllers for winter blankets and mattress pads, gift tags, and tea light candles.  You can never have too many tea lights either.  The plastic tackle box holds other sewing supplies like spools of thread and straight pins, the wicker utensil basket holds lint rollers, and the plain brown woven basket holds things that are beyond our abilities to fix, such as shoes to be repaired and a hand-me-down leather skirt needing alterations.
IMG_3133

One thing I have learned in over eight years of marriage is that Chris is better about putting things away if he knows exactly where to put things.  Enter labels–they may look cute, but they are also extremely functional.  I used fake luggage tags purchased from Michael’s a few years ago to label the smaller baskets and used regular mailing labels for the plastic containers.  The larger bins and the laundry basket need larger, hardier labels, but it’s fairly obvious what’s in these anyway.

IMG_3137

Overall, this took less than an hour to redo.  After putting the vacuum cleaners back in the closet, the labels are still readable and the containers still accessible.  I’ll be opening this closet a lot more often now that some of my craft supplies are stored here, so we’ll see if this organizational scheme sticks.  Even if we change this closet in the future, having somewhat of an organizational scheme makes me feel like less of a basketcase–at least for the next few months!

IMG_3138


Mista Lista: Home To Do/Ta Da List August

Mista Lista took Labor Day Week off, so he’s late with the KaZoo’s August Ta Da List.  Better late than never, right?

Yard

IMG_3063

  • Moving gate latch to the inside of the backyard (Surprise! We discovered we did in fact have a gate latch already, but it was put on the outside to allow free access to our backyard to any interested parties…what-tha-what?)  We now realize how the neighbors were able to show other interested buyers the backyard while we were looking at the inside with our realtor!) (1)
  • Cut down imposing magnolia in side yard (2)
  • Trim trees, shrubs, and grasses (2)
  • Remove sago palms in the way of mowing (2)
  • Replace rotted fence board (2)
  • Test/correct sprinkler aim (2)
  • Clear easement behind fence to keep weeds out of our yard (2)
  • Remove overgrown (ugly) hedges and grasses and snakes, oh my! (2)
  • Remove scalloped landscape edging (3)
  • Add new plants, mulch, and edging (3)
  • Replace odd flower bed between entry and driveway with brick pavers so that we aren’t stepping out of our car into the flower/weed bed (2)
  • Cut down magnolias in backyard (3)
  • Paint faded mailbox (2)
  • Shadowbox wood fence (3)
  • Line fence with crape myrtles for low maintenance privacy and shade (3)
  • Upgrade fence (4)
  • Add sunporch? (4)
  • Add pool? (4)

Paved Areas, Garage, and Attic

IMG_3065

  • Fix garage door keyless entry that cannot be reset/changed for some reason (1)
  • Install paddleboard storage to get paddleboard out of the living room (2)
  • Install carpet squares for walking path around garage hazards (2)
  • Build garage racks for storage (2)
  • Uninstall wire shelving and cut to fit Master Bedroom Closet (2)
  • Pressure wash driveway, front sidewalk, and back patio (2)
  • Patch cracked concrete (2)
  • Fix attic stairs (2)
  • Find new home for plywood hurricane window covers to maximize floor space (3)
  • Organize garage shelves and floor areas so we can find things we need to knock out things on the to do list (2)
  • Install second paddle board rack for Amy’s new board (2)
  • Take out rest of yellowed sunbursts in garage door (so much better!) (2)
  • Install pegboard, hooks, etc.  for functional vertical storage (3)
  • Add floor to attic for functional storage (3)
  • Paint (3)

House Exterior

IMG_3064

  • Change locks (1)
  • Make key copies (1)
  • New wind standard roof (1)
  • Replace weather stripping on back door (2)
  • Remove corrosion from back door (2)
  • Buy hurricane shutters to replace plywood (3)
  • Repaint house numbers (2)
  • Replace front door (4)
  • Replace garage door with wind standard garage door (4)

House Interior

IMG_3066

  • Install new smoke detector batteries (1)
  • Change air filter (1)
  • Install Nest thermostat (2)
  • Install carbon monoxide detector (2)
  • Recaulk windows (2)
  • Install reverse osmosis system (2)
  • Replace windows with energy efficient windows (3)
  • Color correct light fixtures and door knobs (4)
  • Replace cracked/Color correct faceplates/sockets/switches (4)

Foyer, Hallways, and Linen Closet

IMG_3052

  • Tear out carpet and vinyl tile (1)
  • Scrape ceiling (3)
  • Paint walls and trim (3)
  • Upgrade flooring to wood-look tile (3)
  • Redesign guest linen closet to function as coat closet (we have two linen closets but no coat closet!) (3)
  • Wainscoting, beadboard, board/batten in foyer (some sort of special wall treatment) (4)

Front Bedroom (Guest Bedroom/Amy’s Office)

IMG_3045

  • Buy wooden dowel to “lock” broken window (1)
  • Tear out carpet (1)
  • Scrape popcorn ceiling (1)
  • Prime and paint ceiling (1)
  • Prime walls/trim (1)
  • Install MBR ceiling fan so there is a light source and air circulation (this room gets stuffy!) (1)
  • Remove hideous wood-look blinds (1)
  • Install curtain rod (2)
  • Paint walls/trim (1)
  • Install wood-look tile (3)
  • Upgrade shelving in closet (4)

Guest/Hall Bathroom

IMG_3049

  • Paint walls/trim (3)
  • Replace toilet (3)
  • Replace shower head (3)
  • Replace sink hardware (3)
  • Replace vinyl tile floors with wood-look tile (3)
  • Replace lighting (4)
  • Frame out mirror (4)
  • Replace vanity/countertop (4)
  • Replace molded shower/tub combo with tub/shower with tiled walls (4)

Side Bedroom/Craft Room/Future Nursery

IMG_3051

  • Tear out carpet (1)
  • Remove hideous wood-look blinds (2)
  • Install curtain rod (2)
  • Install ceiling fan from Living Room (2)
  • Replace ceiling (2)
  • Paint walls/trim (3)
  • Install wood-look tile (3)
  • Upgrade shelving in closet (4)

Living Room

IMG_3059

  • Tear out carpet (1)
  • Remove hideous wood-look blinds (2)
  • Install curtain rod (2)
  • Paint walls/trim (3)
  • Replace carpet with wood-look tile (3)
  • Take out existing ceiling fan (for bedroom 3) and replace with awesome fan (3)
  • Fix gas fireplace (4)
  • Apply new ceiling (beam and plank for the win!) (4)

Dining Area

IMG_3061

  • Remove hideous wood-look blinds (2)
  • Install curtain rods (2)
  • Paint walls/trim (3)
  • Replace light fixture (3)
  • Replace vinyl tile with wood look tile (3)
  • Install built-ins for china storage/buffet serving area (4)
  • Apply new ceiling (beam and plank for the win!) (4)

Kitchen 

IMG_3062

  • Install our refrigerator (2)
  • Upgrade to gas range so normal family cooking can occur (2)
  • Remove hideous wood-look blinds (2)
  • Install curtain rod (2)
  • Upgrade range hood to functional one vented outside (instead of recirculating) (2)
  • Add electrical outlet for gas range behind it (currently having to plug it into a counter height wall outlet to the left of the range, maxing out the length of the electrical cord-ugh!) (2)
  • Upgrade dishwasher (3)
  • Paint walls/trim (3)
  • Replace light fixtures (3)
  • Reconfigure island (3)
  • Move refrigerator to where panty is and put new awesome pantry where fridge currently is for more functional layout (right now we can barely open our fridge door against the wall) (3)
  • Replace vinyl floors with wood look tile (3)
  • Install wood cabinets (4)
  • Install new countertops (4)
  • Install new sink and smart faucet (4)
  • Install tile backsplash (4)
  • Upgrade pantry to be cabinet pull-outs instead of wire shelves (4)
  • Apply new ceiling (beam and plank for the win!) (4)

Laundry Closet

IMG_3054

  • Install our washer and dryer (2)
  • Paint walls/trim (3)
  • Replace vinyl tile with wood look tile (3)
  • Upgrade shelving (3)

Master Bedroom & Master Closet

IMG_3057

  • Tear out carpet (1)
  • Replace ceiling fan with awesome fan (2)
  • Remove hideous wood-look blinds (2)
  • Install curtain rods (2)
  • Scrape ceiling (3)
  • Paint walls/trim (3)
  • Change closet configuration to allow for two levels of hanging (using extra shelving from garage) (3)
  • Replace carpet with wood look tile (3)
  • Upgrade shelving in closet to non-wire rack closet system (4)
  • Build out coffered ceiling in MBR (4)

Master Bathroom 

IMG_3055

  • Paint walls/trim (3)
  • Replace toilet (3)
  • Replace shower head (3)
  • Install more towel rods and robe hooks (3)
  • Replace vinyl tile floors with real tile (3)
  • Tear out awkward linen closet stealing space from vanity (3)
  • Tear out awkward doorway to toilet/tub/shower area (3)
  • Replace 1 old-person shallow tub/shower combo with 2 person tub plus tile shower (3)
  • Tile bath surround (3)
  • Steal space from torn-out linen closet to replace micro-sized “double” vanity with actual double vanity (3)
  • Replace mirror (3)
  • Replace lighting (3)
  • Replace sink hardware (3)

Was blind but now I see…curtains!

When we moved into the ‘Zoo, all of the windows (except in the bathrooms) had these lovely faux wood, wood-tone blinds.  If they were a rich espresso or even a pale maple, we probably could have lived with them.  But they weren’t.  They also were the older kind with the pull-cords rather than the turning rod for opening and closing them, and the cords had these unfortunate wooden beads on the end that were practically calling the cats to come play  strangle themselves.  We donated the blinds to a local rescue mission that accepts these kinds of items.

Dining2

My mom changed all of her draperies to the blackout kind, so she gave us some curtain panels that she had purchased from Bed Bath & Beyond a few years back.  They are a nice thick weave and a good neutral that will work until I have the time/money to make some that are more “us.”  I love that they have grommets–easy to open and close.  A tad industrial.  Perfect for these:

I really loved these rods best, but they weren’t in the budget.  We decided, in the interest of saving money, to make our own industrial-look curtain rods with the help of the blogosphere and Pinterest, rather than buy them from West Elm.

Aspiring DIYers, beware.  We encountered some difficulties making our rods, and you may, too.  Before we get to the how-to, here’s an overview of the biggest problems we encountered when completing this project:

1.  Hardware Hardships
We couldn’t find the hardware we needed to be able to follow some bloggers’ tutorials, and the big box employees weren’t really able to help us much either since we were using materials in unconventional ways.  We tried following this tutorial so that we could easily take our curtains down to wash/change, but the wing nuts wouldn’t actually tighten despite our best efforts. This resulted in a round #1 DIY fail for us.

On our more successful round #2, the tutorial we followed gave clearer information about what to purchase, but we still could not find the hardware we needed to mount the floor flanges to the wall, which meant we had to improvise a bit.  A well-meaning Lowe’s employee recommended a small screw and washer combo, but we weren’t very confident that his solution would hold anything up, let alone galvanized pipe + heavy curtain panels.  Then I found this pack of awesomeness that looked strong enough for the job (and also fit our flanges):

2.  Paint Problems
Don’t expect to spray paint galvanized metal with typical available-to-homeowners paint and get lasting results.  Some bloggers make note of this; others blithely spray paint their pipe and say “You can, too!”  Because we were aware of this thanks to the more realistic bloggers, we ORBed a scrap piece of conduit leftover from our cuts.  With the wear and tear of curtains being pulled back and forth, we didn’t want to have weird grey streaks where the grommets or curtain clips were rubbing paint off.  When we simulated the grommets sliding back and forth on our test piece, the ORB finish did indeed start coming off.  You could probably spray paint pipe fittings for shelving or something that won’t be subjected to constant motion that would rub the paint off, but we decided to leave our rods in their galvanized state.

photo 2

Note: After galvanized metal has been exposed to the elements (about a year’s time outside, multiple years inside), the zinc oxidizes enough that other bloggers say you can paint the metal at that point.  If, in a few years, we decided to paint our rods, we can; otherwise, we may decided to continue leaving them as is or save up money to purchase “forever” rods.

3.  Manufacturing Mishaps
Not all pipe fittings are exactly alike, even from the same store.  The thread pattern on some of our galvanized elbows was a perfect fit for our conduit, but on others, we had to wrap tape around the ends of the conduit to “thicken it up” so that the fit inside the elbow would be tight enough to stay put.  The elbows were the same size, in the same bin, from the same store, but different manufacturers.  Be careful when sanding the edges of your conduit so that you don’t overly thin the conduit and make this even more of an issue.

photo 3

Enacting Operation Curtain Rod:

The Plan
We  needed rods for 5 standard-ish windows (about 35″ +/- a few eighths), 1 smaller window over the kitchen sink, and 2 extra wide windows (about 70″, again +/- a few eighths).  We made our materials list and went to two different Lowe’s, because neither had enough of the materials we needed.

The Tools
Hacksaw
Sander/sandpaper
Pencil
Level
Hammer
Drill/bits
Phillips screwdriver

The Materials
(5) 10′ pieces of galvanized EMT conduit
(2) 3/8″ galvanized floor flanges per window x 8 windows = 16
(2) 3″ x 3/8″ galvanized threaded pipe nipples x 8 windows= 16*
(2) 1/2″ to 3/8″ galvanized threaded pipe elbows x 8 windows = 16

photo 3

Note: The tutorial we were following called for 1/2″ flanges, pipe nipples, and elbows, but we ended up going with 3/8″ (and a 1/2″ to 3/8″ elbow so the 1/2″ conduit would go in the 1/2″ side) because (a) there weren’t enough 1/2″ flanges and (b) the 3/8″ flanges were a lot cheaper.

*We went to two different Lowe’s and could not find enough of the same size pipe nipples to make all of our rods the same size, so some of our curtain rods have pipe nipples that are 2″ long, while others are 3″ long.  We thought this could be a good experiment to test what worked best to share, so we went ahead with purchasing some 2″ and some 3″ ones (we did make sure that we had two matching ones for each window, though!). At first we thought the 2″ would look better because they would be more like a standard curtain rod, but the 3″ makes it much easier to open and close the curtains, and the panels look more crisp and less bunched because they have more room. We would recommend the 3″ if you are using curtains with grommets, but you could probably get away with the 2″ if you are using curtain clips instead.

photo 3

The Sawing and Sanding
We marked our conduit with a Sharpie at the right measurements for our respective windows, allowing 6″ on either side of the windows so that we could hang them “high and wide.” This isn’t as wide as some people go, but we have a small house, so some of our walls don’t really allow for super-wide hanging.  We used a hacksaw to cut through the conduit, with Chris cutting and me holding the pipe to add sufficient tension for the hacksaw to work.  We could have bought/used a conduit cutter, but a hacksaw is a more universal tool and thus a better buy for us.

2014-07-12 14.56.10

We just propped the conduit in the ridges of our recycling bins to help hold the conduit in place during the cutting process.  After cutting, Chris gently sanded the edges smooth.

2014-07-12 15.06.59

The Assembly
We fitted the elbows, nipples, and flanges together as shown here.
photo 2

Then we screwed the elbows onto the conduit, making sure that they were sufficiently tight and oriented so that they would be flush against the wall.  Testing them against the floor is the easiest thing to do.  As mentioned earlier, we had to add tape to some of the ends of the conduit to account for the variability in size of the elbows.  We didn’t put our grommet panels on just yet because we needed to hold the rods up to the wall to mark the positions of the flanges, and holding up heavy galvanized pipe plus heavy draperies would be even worse.  However, before you screw the flanges into the wall, you will want to put the grommet panels on the rods.  If you are using curtain clips, no worries–you can wait until the end.

photo 4

The Installation
We measured and made a mark at six inches wide on each side of the window by six inches high to achieve a relatively balanced look.  We then centered the flanges on those marks, checked if the rod was level, and traced the screw holes.  We experimented by orienting the flange holes in the T position shown here for some sets of curtains and an X position for other sets.  We thought the T looked better aesthetically, but the X position was easier for drilling/using the screwdriver.  Note: The galvanized flanges leave dingy marks on the wall, but these marks were hidden once the flanges are mounted. photo 2 

We then placed our rods back over the traced holes to doublecheck that everything was still level.  This was not the easiest thing to do, and we had to retrace holes a couple of times.  I tend to be able to spot when things aren’t level by a hair, so this would really drive me nuts if they weren’t exactly spot on.  In fact, I would recommend three people for this phase–two to hold the ends in place, and one person to check the level so that the skewed vantage point of one of the holders doesn’t result in a tilted rod.  Unless you like that sort of look. I probably won’t come to your house, though.  Just sayin’.

photo 3

We drilled holes for the anchors and hammered them in. Then we put our curtain panels on the rods and screwed in the flanges.  The rods were ridiculously heavy to hold up while affixing the flanges to the wall; our arms kept going numb from holding heavy things above our head while also trying to use a screwdriver.  The T position prevents you from using a power tool for screwing the flanges to the wall, hence why we recommend the X position if you can stand it.  This was definitely a two-person gig and would have been better with a third person, as I’ve already mentioned.

photo 5

Since we had some curtains with 2-inch pipe nipples and others with 3-inch pipe nipples, we made sure that rooms with multiple windows got the same kinds of pipe nipples so that one curtain wouldn’t jut out more than another.  It took FOREVER to install these babies, but it’s nice to have window treatments that allow for more natural light, are easier to open/close, and aren’t deathtraps for our cats, which is the most important thing, after all.

Note: We apologize for the horribly dark picture.  We’ll break out the real camera soon. Promise.