Demolition Diaries: KaZoo Kitchen Reno

Newsflash: We are back in demo mode! The KaZoo Kitchen is no more. Well, the old one anyway. When we bought the ‘Zoo in December 2013, our kitchen looked like this:

Kitchen1

It was a typical builder kitchen with basic white appliances, stock thermofoil cabinets, beige laminate countertops, beige vinyl tile, and a micro pantry. All the essentials, and all functional (mostly). Once we brought our old (but newer than theirs) fridge and a new gas range, things were looking up:

IMG_3062

After installing our hood vent in summer 2014, which necessitated the removal of some of our wall cabinets, the kitchen took a turn for the worse functionally and aesthetically. We added some hardware to facilitate drawer and door opening, but the loss of so many upper cabinets was rough. We painted to help the kitchen feel happier until we could do a real renovation.

IMG_3095

In the interim, we began discussing ideas for our future kitchen. Almost immediately, we began dreaming of relocating the refrigerator: Its position in the southeast corner meant we could never open the refrigerator door fully. Stuffing pizza boxes, jugs of milk, watermelons, holiday turkeys, etc. in the refrigerator was next to impossible, but even regular things like heads of lettuce, bagged carrots, and leftovers saved in Pyrex containers proved difficult. While buying a French door fridge might help matters somewhat, we were also frustrated with the inefficient pantry on the opposite end of the kitchen (deep but not wide = digging out 10 things to get 1 item at the back). While having a pantry is nice, we decided we’d rather have more cabinets and counterspace…and was it remotely possible that the fridge would fit in the pantry’s spot if we tore down the pantry?! We couldn’t shake the idea, and after measuring, there was joyous celebration in the KaZoo Kitchen for the kitchen-to-come.

Of course, we were concerned the pantry might be structural, but other homes with our same floorplan in the neighborhood didn’t have a floor-to-ceiling wall at the pantry (the boxy area above our pantry was completely open to the living room in the other homes), which gave us hope. We took everything out of the pantry (feel free to play “Where’s Hermes?”)
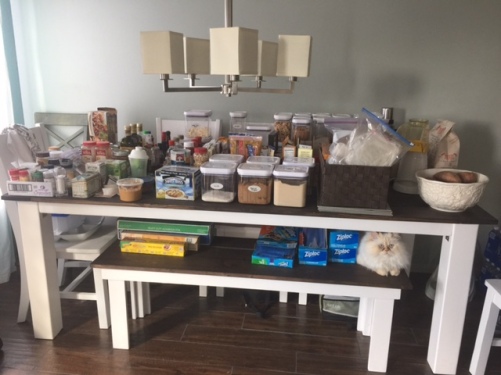
IMG_5912

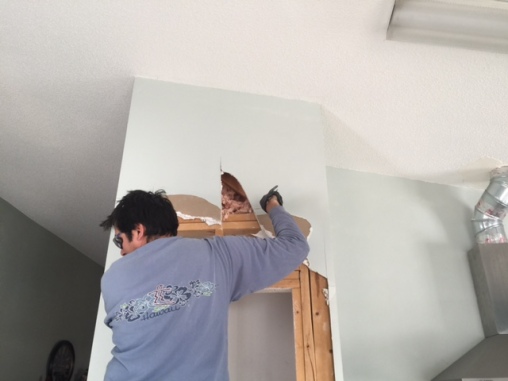
and tore into the drywall above the pantry to check things out.
IMG_5920

Our basic understanding of structures was telling us we were looking good, and after getting a licensed professional to confirm our suspicions, Mission Fridge Move was a go! That’s when the fun of Demo Day began. Kicking down drywall is so…satisfying!

Once the pantry was torn out, it was amazing how open the kitchen felt! While we had attic access above the old pantry/new fridge location, my dad and I installed a new electrical circuit and outlet so that the refrigerator would have its own independent circuit. My dad is a professionally licensed electrical engineer, and while I could do the wiring myself now after years of helping him, I’d rather have a professional on the site.

There’s a lot of shoddy DIY structural, electrical, and plumbing work out there that might get missed in a regular home inspection that can be the ultimate nightmare, so be skeptical of any home that’s obviously been renovated (especially if you see signs of bad workmanship, like the worst painted-over, patched drywall you’ve ever seen). Chances are, those homeowners may not have gotten the licensed professionals, permits, or inspections necessary to ensure a quality job. Installing or moving electrical, structural, and plumbing is a huge deal. Just because a friend or family member ‘taught’ you how to do something back in the day doesn’t mean it’s up to current code or would meet the code for the state in which you now live (Florida and California have specialized requirements, for example). Calling a professional is not a sign of weakness; it is a sign of intelligence. 

We then took out the island, scraped and cleaned the remaining vinyl tiles up, lay the underlayment, and tiled the first part of the kitchen. We also patched, taped, mudded, and sanded the drywall in the new-fridge area.


After allowing those tiles to set, we took out the rest of the cabinets, only to discover damaged drywall behind the sink, where the previous residents clearly had experienced a leak at some point. We expected some damage because of the water damage we had seen in the cabinets, but it was more extensive than we had hoped.

IMG_5996

We had a mold inspection when we purchased the house that came back good to go (otherwise we would not have purchased the home), but we definitely wanted to get rid of the water damaged drywall (and the insulation behind it) ASAP, now that it was exposed and accessible.  At this point, our fridge got to move to its new, happier home. Behold the wonder and glory of being able to open the doors completely!

Can’t you hear angels singing? Hallelujah! We can. Every time I open the fridge now I can’t help but smile. You’ll note that we left the wall to the left of the fridge (a) because it had the kitchen switches on it) and (b) because we wanted the wall to hide the fridge from the view in the rest of the main living and dining area, which it does rather well.

Anyway, out went the damaged drywall, followed by the insulation, as carefully as possible to minimize possible mold spore diaspora. We took out everything in all areas evidencing any water damage plus a bit beyond the damage, both vertically and horizontally, just in case. The studs were fine, though. Whew. We installed new insulation and mold resistant purple-board (the new green-board), which was made easier with a compass-like drywall cutter than enabled us to cut clean circles for the pipe fittings and wiring.

We taped and mudded the new drywall, then lay more underlayment. The floors would already have been finished, but we wanted to keep our range connected to the gas, which has meant flooring in phases.

IMG_6074

Hermes is ready for things to be finished. So are we. Next time we’ll be sharing the finished flooring, painting, and all about the cabinets. I can’t wait to put ALL THE THINGS in the cabinets. And now back to work. 😉

Shopping Tidbit: Eggs Edition

This edition of how to avoid spending money you don’t have to is brought to you from the future, specifically tomorrow (thanks International date line!).  For the past few weeks I (Chris) have been on the road for work, which has its pluses and minuses. On the plus side, I enjoy going places I’ve never been and “putting faces to names”.  On the minus side being away from the ‘Zoo can be a bit lonely and the food is just not nearly as good.

I suppose another plus is that these longer flights (14 hours!) give me time to make up for being way behind on my post count for the KaZoo blog (more importantly way behind on the I promised Amy to write these articles list). So without too much more rambling on, let’s talk about the always exciting subject of …… buying eggs!

Back when I interned at NASA (why yes I was an actual rocket scientist), I met a man named John (also a rocket scientist) who taught Tai Chi and lunch and never failed to give me advice on how to live “better”.  One of his soapbox items was high quality eggs and the difference they made (let’s just say he really loved eggs).

Just to clarify, the eastern shore of the DelMarVa pennisula was a major chicken producing area so eggs were plentiful (even the good ones) so it wasn’t hard or that pricey to get good eggs.  Fast forward to that fall and I am pretty sure I was one of the only college kids willing to pay double or more for “good” eggs for my homemade omelets, which were a collage staple for me.  An unintended benefit of getting the good eggs was that my then girlfriend (now wife) loved those omelets and still does….right Amy?

Anyway, I know there are lots of news articles and blog posts on eggs and which ones are the best. For now, I’m going to forgo that subject for now and just address grocery store eggs (and by grocery store I mean Publix and the Whole Foods in the “city” since WF has not yet decided to grace the “beach” with it’s presence –just announced last week WF is coming in 2015!!).

One thing that is easy to notice is that there are some huge price differences in eggs depending on everything from color, size, egg type, how the chicken’s are raised, chicken feed type, and a whole host of different things.  For example, Publix branded regular large white eggs were roughly $1.59 a dozen whereas heirloom hen, organic, cage free eggs were $3.99 a half dozen (aka $8 a dozen!).  Since I wasn’t ready to drop $8 a dozen for heirloom eggs and we lived relatively close to a Whole Foods, I decided to add Eggs to the list of things to get when I made a Whole Foods run.

Something this (all?) Whole Foods tried to emphasize was local and regionally sourced foods including the eggs they sell.  Of course they, like everyone else, charge quite a premium for the “nicer” local and regional eggs. Since I am all about good eggs, I am not opposed to paying a little more, but I try to make sure that I am actually getting something for my money.  To get a better feel for what I was paying for, I started reading labels specifically to see where the eggs were from, which meant that I soon realized that anyone buying the “regional” eggs were making a pricey mistake.

The regular Whole Foods large, brown eggs were $2.79 a dozen while the “local” eggs from “Willow Farms” were a surprisingly competitive $3.25 a dozen. However, if you wanted the “regional” eggs from Latta’s Egg Ranch (with Omega 3s) those were $4.99 a dozen! Upon closer inspection of the regular Whole Foods eggs, I found that Whole Foods had contracted with Latta’s Egg Ranch for their “regular” eggs. This means that both the Whole Foods and Latta’s Egg Ranch “regional” eggs were from the same place despite the difference in price.

So…semi-pro tip #1 from the KaZoos: Always read the fine print on where your eggs are coming from.

WholeFoodEggs

Whole Foods Eggs brought to you by Latta Family Farm

Semi-Pro tip #2: Always check the egg section for new selections. Our local “beach” grocery now carries eggs from Vital farms, which are really good!

VitalFarmsEggs

Yummy Eggs from Vital Farms. Just a bit pricey ($6)

October Organization: PhD in Pantry

Ever heard the joke about getting a PhD (piled higher and deeper)? Our pantry has earned its PhD for sure. (Anyone else?)

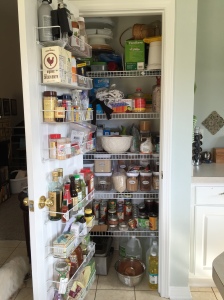
We’ve continued our fall organization mission in the kitchen.  After the guest hall closet and the master bedroom closet, the kitchen pantry was next on our list.  After taking down our upper kitchen cabinets, we are maxed out on space, which means our pantry needs to be as organized as possible to handle some of the overflow.We don’t intend to keep this pantry once we do our major kitchen renovation, but in the interim, it has to multitask as food storage, appliance storage, and storage for portable food storage (cake carrier, trays, etc.).   Here’s how the pantry looked Thursday morning before we cleaned it out.  Not bad, but not great.

Before

IMG_3234

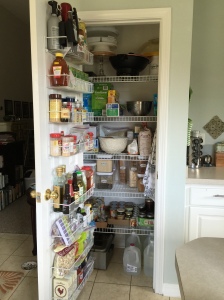
Here’s how the pantry looked afterwards.

After

IMG_3235

Doesn’t look much different, huh? That’s probably true.  We just shifted some things around to maximize the utility of the space.  If you look carefully, you may be able to spot a few places with some extra room that didn’t exist in the before shot…as well as fewer things stacked precariously on top of each other.

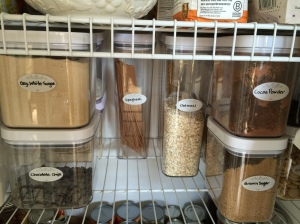
Speaking of stacking, one thing we really do love in the pantry is our collection of OXO POPs storage containers.  Our measuring cups have plenty of room in them for scooping, and they easily stack, minimizing wasted space.  The lids are easy to manipulate with one hand, and they clean really easily, too.  The only difficulty we have with our OXOs at present is that the wire shelves were installed at a height that makes it hard to get the containers in and out when stacked on top of each other, hence why we leave a little space at the front to facilitate shuffling/tipping. It kind of reminds me of one of those sliding number sequence puzzles.

IMG_3238

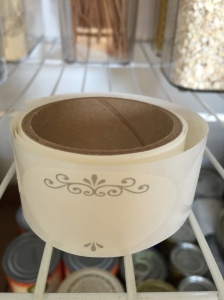
I used dissolving labels for canned goods to label them so that when I empty a container and wash it, the label disappears.  I can relabel to my heart’s content without worrying about having to clean off sticky residue or dealing with those “erasable” chalkboard labels that don’t come as clean as you might like.  I really do like the looks of the chalkboard labels, but these serve a dual purpose in our kitchen, which means I already had them on hand.  Labels are really essential if you want to ensure your family can differentiate between different types of sugar and flour; otherwise, your baked goods may not turn out very tasty.  Voice of experience here.
IMG_3239

We did add an ancient Command hook for hanging our aprons.  Much better than having them fall on us (or the floor) every time we open the door.

IMG_3237Now everything in our pantry has a designated place, which will help both of us return things to their rightful locations on a regular basis, at least until we get to revamp the kitchen completely.  Right now, we plan to move the fridge to where the pantry is presently located so that we can open both doors easily (the right side is hard to open because it is against a wall with a window). Instead of the kind of pantry we have now, we will do one of those awesome pull-out pantries that blends into the rest of our cabinets.  So excited for when that day comes!  Right now we are gathering ideas for our design board.  Hopefully we’ll get to share that soon!

Decision Diaries: (Feeling) Painted into a Corner

Back in November when we first learned that the bank had accepted our offer and we had an official closing date for the new Florida house, I went crazy brainstorming furniture layouts, design schemes, and home improvement ideas. Over Thanksgiving, Chris’s mom, an architect, advised us to paint and then put in new floors before moving our furniture into the house, and she loaded us up with floor samples to take back with us.  Echoing my MIL’s advice, my mom kept asking what paint colors we were planning to use throughout December.

One thing led to another, and by closing day, I was mentally and emotionally exhausted instead of being blissfully excited.  When Chris said we needed to finalize the paint colors so that we could get our paint ordered before the sale at Sherwin Williams ended, I could feel myself beginning to hyperventilate like Julia Roberts’ character in Runaway Bride.  Paper bag. Now.  I realized I was feeling painted into a corner by paint I hadn’t even purchased yet.  We decided to put on the brakes and didn’t buy anything home-improvementish for the house in December or January (Chris did get a mower through Craigslist, though).

So what’s the takeaway here?  Any professional will tell you that painting before putting in new floors before moving your furniture into a house is a good idea.  We agree.  However, it is never sensible and smart to make hurried decisions that you may live to regret, especially ones that involve dropping a considerable chunk of change.  For some people, $1k to paint a whole house at one time is no big deal, but for us it is because we are currently funding two separate residences (one rent, one mortgage, two sets of bills) on one income + student stipend for a few more months.  Shelling out another $10k for floors made us positively queasy.  We also needed to build our savings back up after making our down payment in December at the same time as Christmas travel + presents for lots of people. We chose to save instead of splurge a la Dave Ramsey style.   

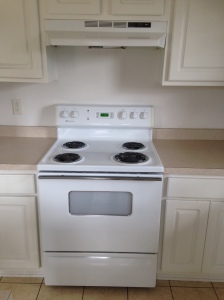
As soon as we decided not to buy paint and floors, I could feel my blood pressure dropping and the chest pains subsiding.  Plus, after a couple of months of saving, we were ready to consider less expensive purchases, such as a gas stove.  The house came with a functional electric stove in extremely good condition, so why replace it instead of buying paint? Look closely. Very closely.

 IMG_1423

I spy with my little eye…that’s right: more little eyes.  Three little eyes and only one big eye, to be exact.  While the electric range has been serving Chris’s needs quite well during the week, cooking on it during the holidays was frustrating for me when making meals to share with a large group, and I knew this would drive me nuts sooner or later.  Most likely sooner, given my proclivity to cooking large batches of food to make meal prep during the week faster. It also took the oven FOREVER to bake things. We’re talking 40 minutes for pumpkin chocolate chip muffins, folks.  Waiting the typical 25 minutes for their yummy deliciousness to be ready is already hard enough, but double the time?  Talk about delayed gratification.

When the gas company turned on our gas in December, they gave us a free installation coupon for any one appliance, good through March.  Since they also gave us the happy news that we have a ‘gas nub’ behind our oven, we knew we’d want to switch to gas at the earliest opportunity.  When we found out that it would be $140 regularly for them to install a gas range (and you have to pay $60 for installation if you get Sears to do it), we decided that purchasing our gas range during Sears’ Presidents’ Day sale (35% off Kenmore appliances + additional 10% online purchases + free delivery) and getting free installation would be a better idea than buying paint.

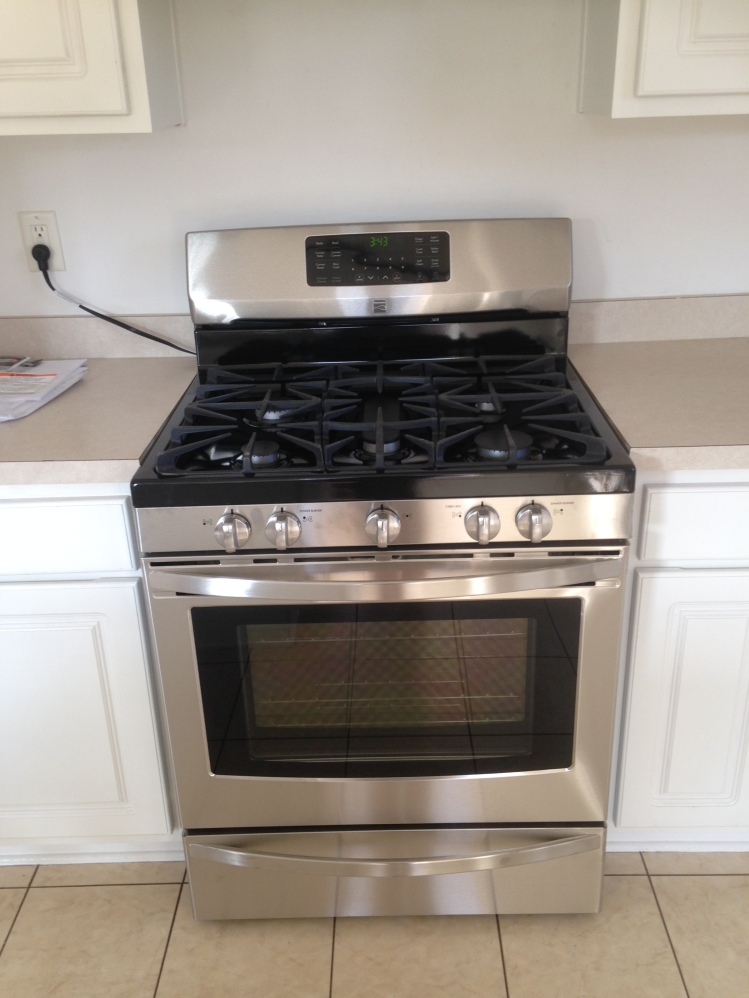
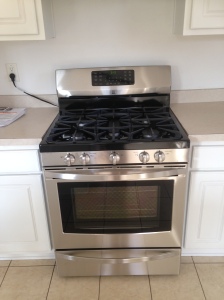
After doing some research, reading Consumer Reports (strongly recommend a subscription if you are making big $ purchases) and product reviews until our eyes rotted in their sockets (not really), and discussing our needs/wants, we narrowed our choices down to three Kenmore products.  We’ve had great experiences withKenmore appliances in the past, so we were comfortable/confident going with another Kenmore product.  After weighing features and prices, we selected the Kenmore 5.6 cu ft. Gas Range with True Convection Stainless Steel with Stainless Steel top as our winning gas range.  We actually chose not to get a Kenmore Elite or Kenmore Pro, primarily due to price but also because the regular Kenmore met all of our needs/wants.  See it here: http://www.sears.com/kenmore-30inch-freestanding-gas-range-w-convection-oven/p-02274343000P?prdNo=3&blockNo=3&blockType=G3

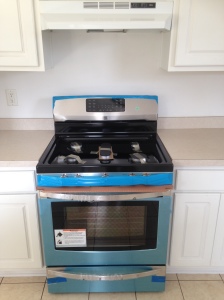
Unfortunately, the range we selected wasn’t 35% off, presumably because of the beautiful stainless steel top. Womp, womp.  We decided to get the $350 cheaper-but-same-model Kenmore 5.6 cu ft. Gas Range with True Convection Stainless Steel with Black top that was discounted, and we’re more than happy to be saving even more money that can go towards other things.  

IMG_4766

In the end, we saved $500 on the range and got free delivery, thanks to the awesome sales and two coupons/promotions we were also able to use towards our purchase.  Major score for us. We also Craiglisted our electric range and recouped $150 for it.

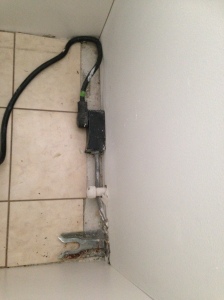
The gas range installation went rather smoothly, with only one small hiccup: There isn’t a regular electrical outlet behind our stove, so we had to plug the range into a wall outlet on its left (I know you’re thinking: Wait? I thought the original range was electric, so how is there not an outlet behind it (or how did they not notice this before)?  Answer: There is a special outlet at the bottom of the wall that was perfect for the electric range but not for our new gas range.)

IMG_5744

It’s a bit awkward-looking to say the least, but that’s something we can remedy in the near future, thanks to my dad who happens to be an electrical engineer and rather handy with home repairs and fixes in general.IMG_0383

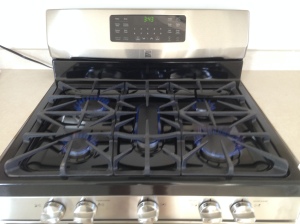
Best part? It looks more high end than it actually is and cooks like a dream.  The burners light instantly (no repetitive clicking and hoping, for those of you familiar with older gas ranges), and all the special burners (simmer, turbo boil, etc.) perform their respective functions exceptionally well.

IMG_1913

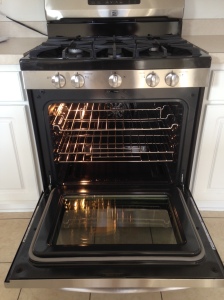
My husband inaugurated the oven by baking yummy cookies, but unfortunately (for me) I was in the city at the time so did not get to enjoy them.He used soy-filled chocolate chips, so none for me anyway.  After eating some of his cookies, he decided my soy-free chips taste better. #foodallergies #smartman

 IMG_6739IMG_8881 

On my ‘spring break’ this past week, I joined Chris in FL and baked some of those pumpkin chocolate chip muffins again.  They were easily done in 20 minutes and could have probably have been taken out earlier than that–faster than the time range given in the recipe!  As for all those people who say that gas ovens don’t bake well, think again.  Double-fisted muffin eating may have happened in our household. Evidence, you ask?  They were devoured so quickly I didn’t even have time to snap a good pic.  Next up? My favorite pound cake recipe that hasn’t ever worked in an electric oven yet turned out perfectly every time in a gas oven.  Pound cake + fresh berries = Supreme Deliciousness.

Overall, moving more slowly down the path of home improvement is allowing us to savor every minute instead of sweating every dime and decision.  We’re enjoying the calm and contentment of knowing we will get around to doing things when the time is right.  After all, we’re on island  beach time here, and we’re good with that.

Something Old, Something New: Herb Garden

In honor of Halloween,

SPOILER ALERT: This is not a Halloween-themed post.   Sorry, folks!  I threw caution thematic blogging to the winds and decided to post about herbs, especially now that we have had our first hard frost and people might be thinking about bringing delicate plants indoors (or mourning their brown-and-black outdoor plant life).

We have started cooking with fresh herbs and love it.  I have totally joined the fresh herbs fanatics camp. It all started when I wanted to make homemade margherita pizza using fresh basil, which resulted in buying one of those wee organic basil plants so that I could have enough leaves to cover a pizza at a reasonable price.  That was last October.  Unbelievably, I have kept an inside plant alive for an entire year.  A. Ma. Zing.

I loved landscaping back when we owned our own home (and yard!) and didn’t have HOA restrictions on the kind of plants you can put in your yard. “No, you are a Bradford pear yard, so you can’t plant a Japanese maple.”  #Renterville This pretty much dampened any enthusiasm we had for improving the curb appeal of our current location…but not our enthusiasm for plants.   Consequently, I’ve been restricted to containers. On a small deck.  In full sun. In the South.  Le sigh.  Perhaps this, rather than the pizza, is what drove me to indoor plants despite not having the best track record with remembering to water them….

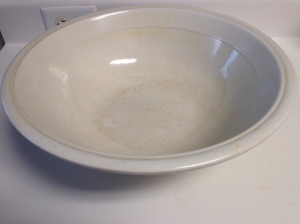
Anyway, given this surprising success with a lone basil plant, I decided to risk succulents.  They don’t need much attention, right?  I love succulents, and I like that their colors tend to coordinate nicely with all the fall/winter harvesty things like pumpkins, kale, etc. but also look crisp and cool in spring/summer.   I was really hoping to put some in a set of three glass containers my mom gave me I rescued from my mom’s giveaway box and make an entire succulent garden in an antique washbowl that Chris’s grandmother gave us was also giving away.IMG_2372

So in typical fashion, Chris and I headed to our local garden center/big box home improvement store (we prefer Blue but Orange has some good things, too) to look at the discounted/end of season plant selection.     The previous year, we lucked out with some ridiculously cheap gerbera daises and other flowering plants that somehow survived dying in the winter to bloom again this spring/summer.  No such luck this year, though.  I joked that the succulents were actually “sucky-lents” (yes, Chris groaned, as I’m sure you are doing, too).  The only ones that did not look pitiful were $$$ or mixed with cacti, which should not be part of a household with curious cats who like to rub on everything with texture. Trust me.  Plucking cacti stickers from a cat’s face is not a happy experience for anyone involved. Lots of gnashing of teeth and bleeding.

We went home empty-handed and sulky.  Okay, I went home sulky.  I think Chris might have been silently cheering.  Plants are not his thing.  He says it’s because he’s allergic to grass.  I think he’s “allergic” to plants in general, seeing as how he doesn’t seem to like eating many of them either.  Iceberg lettuce, raw carrots, and canned peas and green beans = the vegetable group for most of his life. [Shudder].   Thankfully he’s expanded his horizons in the last seven years since we got married.  Now he’s even eaten collards and fennel.  Ah, the things he does we do for love.

Then I saw this soup recipe in the Williams Sonoma catalogue that I wanted to try, now that colder weather is here.  The recipe called for fresh herbs…so I decided to create an herb garden in the washbowl instead of pining for puny or pricey succulents that just “look pretty.”  Chris heartily agreed to this idea, so we bought a rosemary plant and a parsley plant to join our beloved basil.

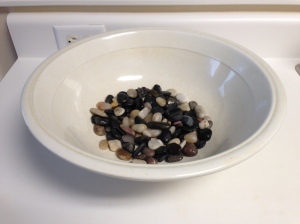
In the washbowl, I first laid a bed of river rock to facilitate drainage around the roots.

IMG_2373

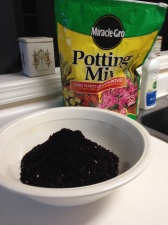
Then I topped the rocks with some potting mix (aka whatever was leftover in the garage…not sure this is typically what you’d typically use for herbs, but it was already purchased).

IMG_2374

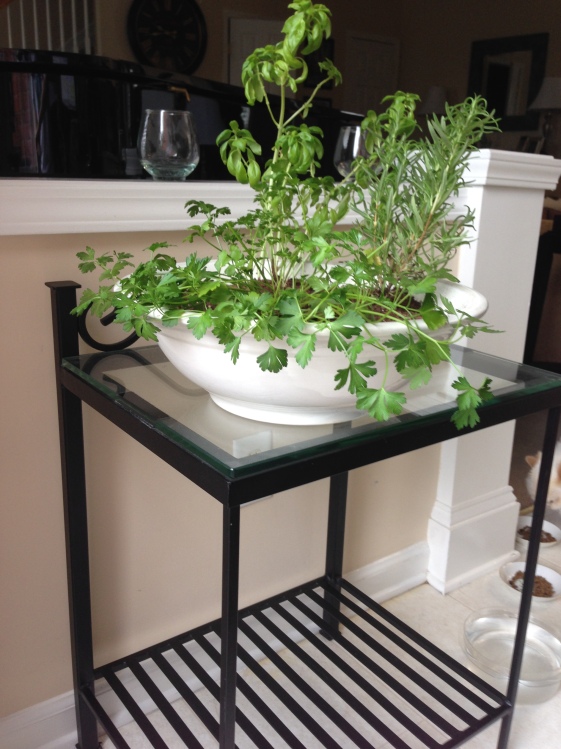
Then I planted and watered the herbs…and ta da: herb garden!

IMG_2376

With regular misting, the herbs are flourishing and are making regular appearances in our meals.

IMG_2377

In fact, dear Basil seems to be doing better than when he was a lone ranger.  Is there such a thing as a social plant? Who knows.  The herbs sit in the microscopic “breakfast area” where they can receive enough sun but not freeze with winter approaching.

IMG_2385

PS: That soup recipe didn’t turn out so well (too expensive for the tastiness factor, which was lacking greatly IMO), but at least it was the catalyst for the herb garden and the subsequent tasty meals it has provided! 🙂

Sunday Suppers: Homemade Meatloaf

Okay,  so I have been seriously dropping the ball with this whole KaZoo blogging thing (This is Chris, by the way). So first things first: Sorry about that. When Amy first had the idea that BOTH of us would be contributing to the KaZoo (what I call it in my head), I was really unsure about how I would contribute since the entirety of my sewing knowledge was based on a 5 minute emergency button replacement lesson I received at my first job (I was a “Formalwear Consultant” at a formalwear shop). Even though I’ve only used this skill about 3 times, my wife has graciously relieved me of sewing duties since my method correlates quality with thread amount (AKA good sewing = MOAR Threadz). If you are thinking that you’d like to know how to sew a button, I suggest this link ( http://www.artofmanliness.com/2012/06/28/sewing-on-a-button/) from a website I recently found.

I suppose I should get on with the post at hand, now that we have established that, just like talking in real life, Chris blogging equals going down rabbit holes. After consulting blog experts (reading articles on “how to blog” on other blogs) apparently the thing to do is blog about things you like, enjoy, are good at, or want to become good at. So I am thinking I’ll start this out with a thing I like: FOOD!

Growing up, my parents would have definitely classified me as a picky eater, as there were many “rules” I had about food. Like many picky eaters, these rules started out with unreasonable statements like, “EW! I’m not eating that; the food is touching each other!” when I was young and were subsequently justified later on with things like, “That has TOO many flavors.”  Luckily for me (and Amy too), I have been steadily moving away from picky-eater-land since we’ve been married, which brings me to the recipe that I’d like to share: MEATLOAF. Specifically, what I call Amy’s mom’s meatloaf.

My prior beliefs on meatloaf fell under the “too many flavors” (meat, onions, AND sauce – horror of horrors!) rule, and my reaction the first time Amy suggested we have meatloaf for dinner was basically this: (try the commercial for the short version)

As it turns out, I never had meatloaf like Amy’s family recipe, and now it’s become one of the things I actually do well.  I have learned that not all meatloafs (meatloaves?) are created equal.  So without further ado, here is what you need (with what I used in parens):

Ingredients:

  • 1 pound fresh ground beef (we use lean, grass-fed and I prefer to let it get to room temp or close before starting because colder=hand frostbite)
  • 1 large egg
  • 1/2 cup milk (we use 2%)
  • 1/4 cup chopped onion (vidalia or sweet)
  • ~ 1/2 cup quick oatmeal (we use Quaker Oats)

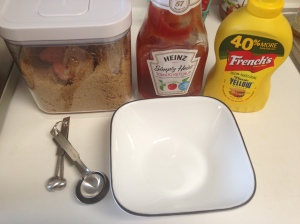
Special sauce:

  • ~1/2 cup brown sugar (I usually get close, but probably a little more than exactly 1/2 a cup)
  • ~1/4 cup ketchup (We use the Simply Heinz kind, and I usually use a little bit more as well)
  • 1 tsp mustard (we use French’s regular yellow mustard)

Directions:

SPOILER ALERT: Making a meatloaf is not pretty.  Taking pictures of said making of meatloaf is not pretty either.  But it’s pretty good eating, which justifies the making.

Preheat oven to 350 degrees.

Since our oven take a few minutes to heat up, I usually start the preheating right after I’ve gotten out all my ingredients, but before I start mixing ingredients. Once that is done, I chop the onion and then combine the milk and egg using our handy dandy hand mixer.


Meatloaf_prep


Making the loaf:

While oven is heating up, beat egg and milk in large bowl.
One Egg in Milk

I use a combination of the 2nd and 3rd (of 5) speeds on the mixer until the mixture starts to get a little bit bubbly. Mixing!Don’t worry:  It’s not an exact thing, and I’ve probably varied in bubbly-ness over time.Bubbles!

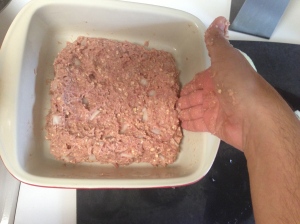
Once your preferred bubble level has been established, add the meat, onion and oatmeal to the liquid mixture.  IMG_7269The next step is why I let the meat warm a bit (if I remember). Time to mix the meat, liquid, onion, and oatmeal by HAND until the meat has absorbed all of the liquid and the onion and oatmeal is sufficiently mixed in. Forgetting to let the meat warm a bit results in some eskimo cold hands. Note: I do not recommend warming the meat in a microwave as inevitably it results in partially microwaved beef (also why we prefer fresh meat). Remember to wash hands before this step or use prep gloves.

.IMG_7271

Add salt and pepper to taste (Amy typically does this part.)

Transfer mixture to the meatloaf pan and form into a squarish shape. One key thing I’ve learned is to ensure there is gap between the pan wall and the meatloaf.  Also, I make sure there is a slight depression (aka lake) in the center for the special sauce on top of the meatloaf so that it doesn’t run off during the cooking process.

 IMG_7272

Important note: Amy’s mom recommends a shallow square pan, which is not the traditional “loaf” pan but allows for faster cooking and more surface area covered in sauce…which is of course, the best thing about meatloaf.  Secretly, I think this is the only way she could get Amy to eat meatloaf when she was a child–if there was more sauce. Lots of sauce.  Speaking of sauce….

Now it’s time to make the sauce that really makes this recipe stand out and is a cinch to make.

IMG_7275

Just stir together your brown sugar, ketchup, and mustard in  a small bowl until you get a consistent mixture. I’m not a huge fan of mustard but don’t even notice it in this sauce.

IMG_7277

Pour over meatloaf, staying within the lake  you’ve made in the center of the loaf.

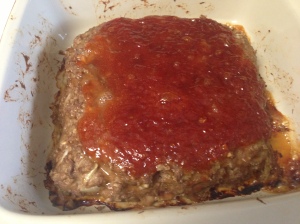
Hopefully, by now your oven has preheated and is ready to go. Simply place in the center of the middle rack, and bake 30-40 minutes or until done.  Our current (please, please let it soon be former) condo oven usually takes a total of 45-55 min, but prior ovens have  previously been close to the recipe time. While you wait for it to cook, you can prepare yummy sides. IMG_7281

Chris words of wisdom: No matter how much you make fun of an oven for not being hot enough to make recipes come out on time, it is never ok to attempt to lick a meatloaf pan as you remove it to get that bit of sauce that you spilled. Luckily for everyone, my wife always has an eye for when I am about to have an EPIC Fail and a loud voice to yell “STOP!!!”  After all, burnt tongues don’t get to enjoy the yummy meatloaf.

So as you can tell, I am now a convert to the greatness of meatloaf despite the fact it is made up of even more ingredients that I previously thought.  We don’t have meatloaf very often since Amy tries to get me to eat less red meat, but that makes this more of a treat when we actually do. I typically justify requests for meatloaf with statements like, “We can have it with green beans” so that Amy agrees to have it.  Works every time. Except probably not after this post.