KaZoo 2016 Year in Preview

Mista Lista is back, baby! Since the entirety of the ‘Zoo has been a construction zone for awhile, Mista Lista took a long vacation. A sabbatical, if you will. Now refreshed and ready for the new year, Mista Lista is back on the blog to share a sneak peek of what’s on the schedule for 2016 in the ‘Zoo.

Mista Lista has noticed the KaZoos aren’t the best at finishing projects on schedule (Can I get an amen?), or remotely close to schedule, for that matter.  I call it Creative Minds Meets If You Give a Mouse a Cookie Complex.

Creatives aren’t always known for progressing sequentially and logically along the shortest possible path to the endzone. They zig. They zag. They occasionally throw a series of backward passes. Wait a sec, that’s football. My bad.

Creative types often start a number of projects that sit in various stages of semi-completion as their enthusiasm for one idea is soon overtaken by inspiration for another. Their creative energy is diverted again, and again, and again, leaving them with a garage full of tools/supplies and a house full of construction projects hazards.

And of course, this haphazard completion is helped (?) along when the beginning of Project A leads to the beginning of another related Project B. For example, when the KaZoos wanted to install their range hood vent, it meant tearing down the upper kitchen cabinets first to make room for said hood vent. But cutting holes in the roof for exterior ventilation meant getting someone to cut the hole in the roof and seal the opening (that would guarantee the work). And given the existing roof was nearing the its end of life, shouldn’t they just go ahead and replace it while the guy was coming out to look at the roof? And on the story goes. Anyone else need a cookie and milk after that? I thought so. 

Therefore, without further ado, I give you the KaZoos’ 2016 resolution:

Finish what you started.

Startling, I know.

So what’s on the docket? Here goes, in no particular order:

Mrs. KaZoo’s Dissertation
We’ll start with the most depressing and boring project, Mrs. KaZoo’s dissertation. Yup, this project is getting knocked out in 2016. I realize this probably doesn’t interest (m)any of you, so enough about that.

King Quilt
Mrs. KaZoo plans to finish the king quilt she started two (three?) years ago so that the KaZoos have cooler covers for the warm summer weather.

IMG_2154

Backyard Fence
The KaZoos have had a partially fenced backyard for months now-the result of working steadily but slowly to replace fence panels as time and money allowed. As the KaZoos near the year anniversary of starting their fence job (March), they plan to have this baby complete and inspected before winter is over, or February. They actually tackled the back gate the previous weekend, so here’s hoping they can get a few more panels and the last two gates done in the next couple of weekends.

IMG_4309

Fireplace Wall
It’s time for the fireplace to get some more love, just in time for Valentine’s Day, perhaps? The KaZoos built footings for the mantel last weekend, so all that’s left is to reinstall the mantel, caulk, paint, and tile the fireplace surround. And calling a chimney sweep to clean things up from the renters who tried to burn wood in a fireplace designed for gas logs. I know, right?! 
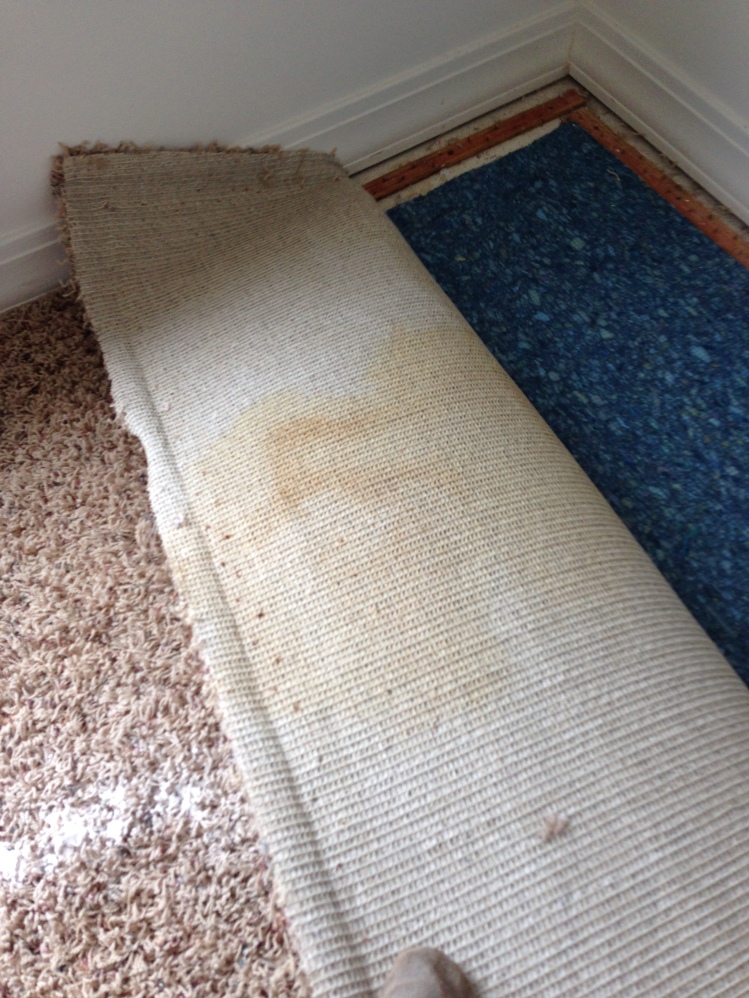
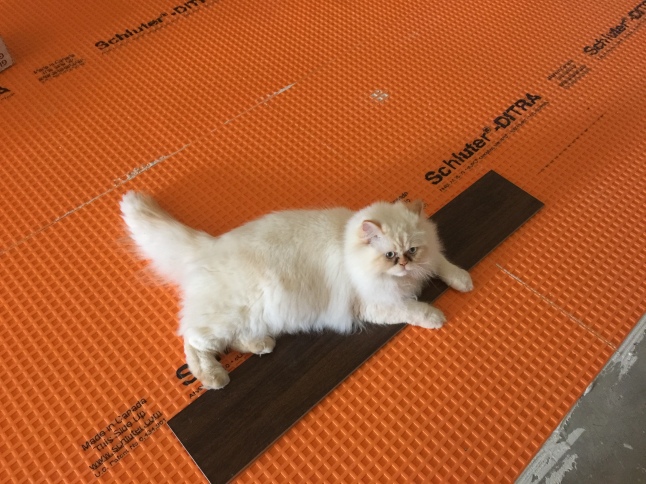
IMG_3845

Floors
The longest project in the history of the ‘Zoo. Seriously. What’s left, you ask? Laying underlayment in the guest wing, tiling and grouting the guest wing, and tiling and grouting the master wing. Oh, and the kitchen and master bath after those get demolished. 

IMG_5008

Baseboards
Once they get the floors finished, the KaZoos plan to install new, chunkier baseboards.

IMG_5063-1

Paint Touchups
The Kazoos need to touchup the paint in a few areas around the house. Seriously, people. A finished paint job makes everything look more polished.

IMG_5503

Kitchen Renovation
The KaZoos also have a BIG kitchen reno in the works. Design, demo of existing pantry, relocation of refrigerator and waterline, new drywall and paint, purchase and installation of new cabinets and countertops, you know. All in a day’s work, right? Smirk.

IMG_3095

The fools KaZoos intend to complete all of these projects in the first half of 2016, but I’m not going to hold them to any promises. {Wink.}


Christmas at the ‘Zoo

Mid-October, Chris suggested we put up our exterior Christmas lights on Halloween weekend. After recovering from a serious laughing fit, I countered with Veteran’s Day, as autumn is my favorite season, even if Christmas is my favorite holiday. Glittering icicles take away from the pumpkins, and I like to let the pumpkins have their moment.

IMG_5372

We finally put up exterior lights on the weekend after Thanksgiving.

IMG_5511

Thanks to our tiny driveway and three cars, you can’t see all the lights. And the blinding orb? A snowflake. It shows up better in real life. #notaphotographer

This year, #flooring marathon2015 meant we barely got the main living areas floored in time for the holidays, so there was a bit of a delay on the decorating. But the good news is that the main areas have real floors again, and we love them!

We did manage to put up a few Christmas decorations inside before the start of December, and I even swapped out the scrapbook pages in the white frames for Christmasy ones for less than a dollar. I had a hard time choosing between all the different possibilities, so right now the wall is host to “Rustic Christmas” but will soon be switching to “Sparkly Christmas” for fun. IMG_5473
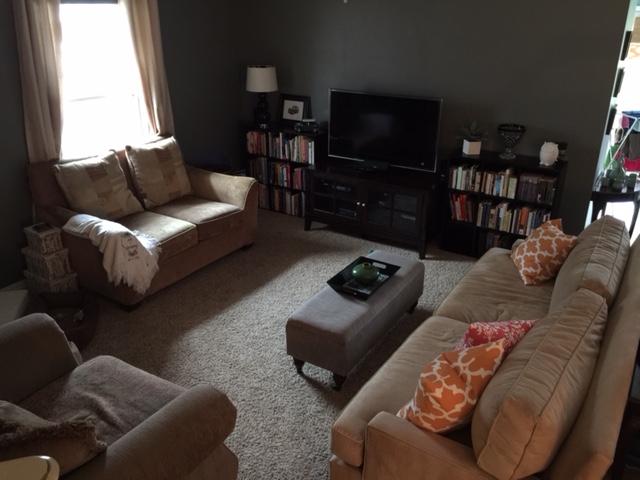
You can also see this picture features a Homer bucket housing the Internet goodies (we threw the router, AirPort, and all the cords in a Homer bucket to keep them safe from the construction), laundry being folded (hey, that’s impressive, right?), and a mirror we used to see the back of the TV for hooking up electronics. Keeping it real, peeps.

I finally put up our main Christmas tree after the first full weekend in December. As you can see, we are still touching up paint and working on the mantel. #stockingsmaynotbehungbythechimneywithcarethisyear BUT LOOK AT THOSE FLOORS. AND THE TREE!

IMG_5503

I use both white and colored lights on the same tree.  Why? Because I can. When Chris and I got married and it came time to put lights on our first big Christmas tree together, there was cause for pause: Chris’s family always used colored lights on their tree, and my family always had one tree with white lights and another with colored lights…but Chris and I only had ONE tree. What to do!? Inspiration struck, and I decided to put both white AND colored lights on the same tree but on separate circuits plugged into our multiplug.  That way, if we are feeling like a White Christmas, we can have only white lights. If we want only colored lights, we can have that as an another option, too. But we agree that both is best. More light is always the answer.

I realize the delay in decorating for Christmas is seen as a blogger crime against humanity. This is ridiculous, folks, given how many bloggers have expressed frustration and anxiety over trying to decorate early in time to be featured here and there. I understand that for most of those who fall in this category, blogging is a source of income, but seriously, people. In the interests of trying to attract and retain the attention of more popular bloggers, corporate sponsors, and followers, bloggers are sacrificing the joys of the season on the altars of commercialism, consumerism, and materialism. Jesus was apparently just fine with a stable. Why aren’t we?

Don’t get me wrong, I love decorating for Christmas, and I normally have my Christmas decorations up by Thanksgiving so we can enjoy them for longer. Because I have a pre-Christmas December birthday (and probably because I’m a girl), I have received a lot of birthday and Christmas presents that happened to be Christmas decorations. I can count on one hand the times I have purchased ornaments for myself. I love them all, and every year when I unbox them, it is like saying hello to old friends and family. I also inherited a lot of Christmas decorations from my parents who don’t decorate as much anymore, probably because they don’t have me at home to do it anymore. #childlabor #momwasallergictothetrees #dadclimbedontheroofthough #ilovedit

IMG_5504

This tree gets most of the soft ornaments because its top wobbles a bit, and the cats can reach it from the table, meaning a disaster is likely to happen.  The larger tree shown above gets soft ornaments around its base only.

Each item brings to mind the person who gave it to me–from the ornament my first babysitter gave me to the festive present lights from one of my college roommates. When I set up my Fontanini nativity scene, I remember my mother’s sister who started my collection before she suffered a heart attack and died a few years ago. This year, when I placed my Byer’s Choice carolers on the bookcase in our new library/music nook, I thought of a dear family friend whose caroler collection was the inspiration for mine; she passed a few months ago after a long battle with cancer and lingering complications. As I open each item and recall the giver, I say a prayer for those who are still living. For those who have passed, I pray for those they have left behind. IMG_5509

For the past two years, my mom has given me beachy ornaments, now that we live at the beach, so I had just enough ornaments for a small sea-themed tree. I used a tree that was rescued from my grandparents’ attic after my grandfather passed away this summer. It was in sad shape, but I think it turned out okay. It didn’t have a functional base, and since I’m too cheap/lazy to buy floral foam, I just stuck it in an old decorative urn from Pier 1, weighted down with river rocks. I don’t exactly recommend this, as Hermes has pulled it over a couple of times. #lifewithcats This tree has all the shatterproof ornaments on it, thankfully. I hope to add a starfish at the top before Christmas.

IMG_5487

If you are wondering about the ombre effect with the darker indigo lights at the base and the bright turquoise at the top, you can thank Target circa 12 years ago. I bought a set of blue Christmas lights from the Target Christmas clearance section, and the tint wasn’t uniform. I’ve always loved the anomaly, and they’re still going strong. #happyaccidents #pleasemakethemonpurpose

Now back to my concern about Christmas and the need to DECORATE WITH ALL THE THINGS. I love to decorate for Christmas because I cherish the people and memories associated with those decorations–not because my house needs to look just-so for the right people. For me, each decoration is a reminder of love.

IMG_5512
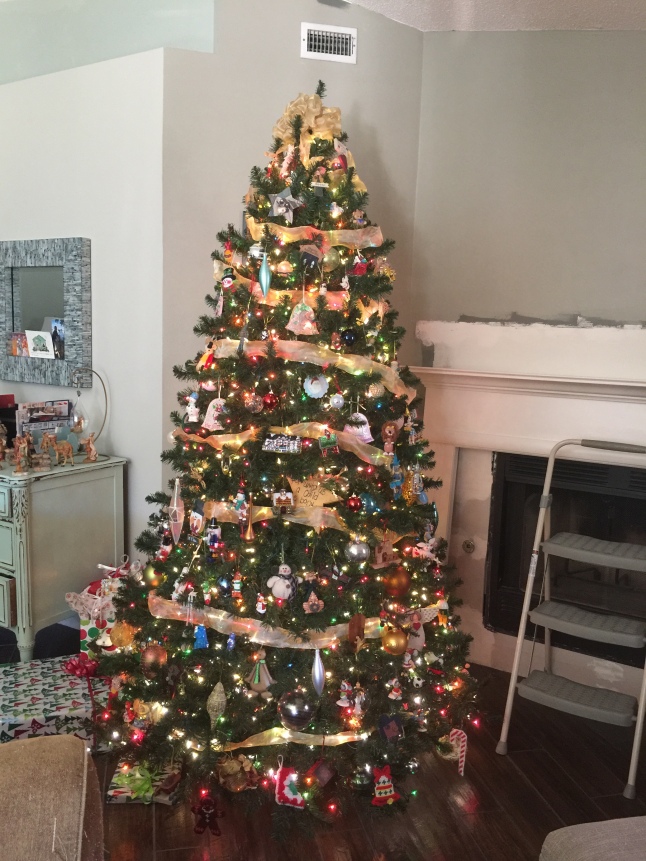
My concern is that we are so busy preparing for Christmas that we miss Christmas by forgetting to be still. At the very time we celebrate Emmanuel, God with us, we forget to be with God. We have become Martha, busily cleaning and crafting and decorating and baking and shopping and gift-wrapping, instead of being Mary–just sitting and listening to what God has to say to us. Or perhaps, because of the way ‘professional’ blogging works, it appears to all the world that the best bloggers can be both Martha and Mary, rendering numerous readers (and other bloggers, even!) feeling hopelessly inadequate at both. At a time we should be demonstrating authentic love for others, we hand them unnecessary heartaches wrapped in a perfect bow instead.  Not cool. Let’s get out of the kitchen/craftroom, off the internet, and into the Word as we celebrate the time when the Word became flesh and dwelt among us.

Off my soapbox, now. I promise. And because every good post has cat pictures:

IMG_5492

At least I know they like our trees…and they know how to be still, at least for a little while! 🙂


Musical Furniture: The Game We Love to Play

It’s a running joke in my family that one of our unofficial side businesses is furniture moving.  That’s because we do it ALL. THE. TIME. We like to play furniture shuffle within our homes on a regular basis, always searching for a better arrangement that maximizes space, storage, etc. It’s part of our exercise plan. Kidding. Sort of.

Of course, the game is made more difficult by, you guessed it, musical furniture. I rarely see design bloggers working around grand pianos in small or modestly sized homes, so I thought I’d tackle this topic for our home and blog.

Musical instruments have particular needs. Climate control is important, so avoiding placement near sources of heat, cold, and moisture is vital. Dreams of baby grands gleaming in Victorian window bays shattered. Tragic, I know.  

When placing a grand piano near a wall (avoid those exterior ones, remember!), you’ll also want to allow enough room to open and raise the lid and to access all parts of it for cleaning and polishing, which typically means a minimum allowance of 12 inches away from the wall. Positioning the piano so that the long side runs parallel to the wall is more aesthetically and acoustically pleasing.

People with larger homes, multiple living rooms, and/or extra bedrooms/bonus rooms have it easy. Not so with the ‘Zoo. We have a three bedroom home with only one (not-so) great room, and we need every bedroom we have as a bedroom. No dedicated home office. No home gym. No music room. No home theater room. No basement. No bonus room. No playroom. No library. Just one modest living room with a little nook off to the side.When we bought the ‘Zoo, we were delighted that the living room had that extra nook so that my 5’ baby grand piano would only encroach upon the main walkway by a foot or so. Unfortunately, when the lid is not raised but flipped back, Chris frequently runs into its sharp corner. Sacrifices must be made right? Kidding. Definitely not for the best.

IMG_6242

To prevent further stabbings, we tried a number of different furniture arrangements in the living room over the past year or so, but nothing really felt like THE ONE. Consequently, during #flooringmarathon2015 I played around with furniture arrangements for when we could move everything from our personal “Room of Requirement” into the rest of the house. Here’s the rub:

  1. The piano has to stay in the main interior space and not in direct light or near a heat source. It cannot stay in its present position due to stabbings, nor can it be rotated in this spot without causing increased stabbings. If you are thinking that we could simply raise the lid and solve this stabbing problem, let me add that we have all tile floors and vaulted ceilings…and I’m fairly certain the neighbors can hear me playing/singing with the lid shut. I trained as a vocal performance major before shifting into education, and I’m fairly certain that my neighbors don’t dig opera…or anything remotely classical.
  2. The computer desk must be in the main interior space and receive some natural light but not suffer glare. I won’t go into detail, but suffice it to say that I don’t like working in bedrooms where relaxation is supposed to happen. Especially if said bedrooms get hot in the afternoon. 
  3. The black bookcase, like the piano, is visually and spatially dominant. It looks best when positioned against the long, tall walls of our home.  Who are we kidding? These are the only walls where it fits!IMG_4428
  4. Obviously, we need to have the sofa and love seat be in the living room if we want company. And we do. But our sofa is 92″ long.
  5. Also the TV. There is only one wall in the true living room area on which the TV fits and only one functional cable jack (not on that same wall, though, because that would make TOO MUCH SENSE). This area of the house is inaccessible for rewiring without tearing down the ceiling because there is no attic above it, so the TV cannot relocate to more spacious walls.  Awesome, right? I KNOW.IMG_4589
  6. The dining area is too small for the sitting area, and the dining set doesn’t fit in the current music nook.IMG_4375-1
  7. The thermostat also happens to be on one of the only tall long walls and could be blocked by the black bookcase, depending on its placement.
  8. No TV in the bedroom. I’m a firm believer that TV in the bedroom = less, well, ya know. Sleeping. Plus, our TV (an older model flat screen) emits some serious warmth, making our bedroom way too hot. And watching TV from the bed encourages bad back problems. Definitely don’t want more of those.
  9. I need room for exercising in front of the TV. Gyms = germs . I also am firmly opposed to exercise equipment in the bedroom or main living spaces. Call me a design snob, but it is what it is: Gym furniture is hideous. This doesn’t bother some people, and that’s to their advantage.  It kills me. Now, if someone could make a home gym disappear into an attractive armoire, then I’d be all for it. Hmmm…MY IDEA. INTELLECTUAL PROPERTY RIGHTS CLAIMED.
  10. Last of all, we must be able to walk from area to area without gut stabbings. We are anti-stabbing in this family, as all families should be.
  11. We celebrate Christmas and inherited an artificial tree with a large diameter that also gets to be squeezed into our bursting-at-the-seams living room. Christmas doesn’t get sacrificed around here, so I always include a Christmas tree in my furniture arrangements, knowing that the arrangement will be more spacious without it the rest of the year but will have sufficient space for it during the Christmas season.

If this sounds like a cross between an LSAT question and a design dilemma, you’re right.

After much deliberation, we developed a new arrangement, and the piano moved. I decided to throw caution to the winds and take a leaf out of the luxury home design book by sliding the piano into the center of our open living room area, directly in the main thoroughfare of the house.

Crazy? Yep. Tight? Definitely. BUT…

  1.  The TV, flanked by bookcases, stays where it fits (and functions) best in the living room, and the bookcases (will) hide the tangle of cords currently housed in a Homer bucket.IMG_5468 
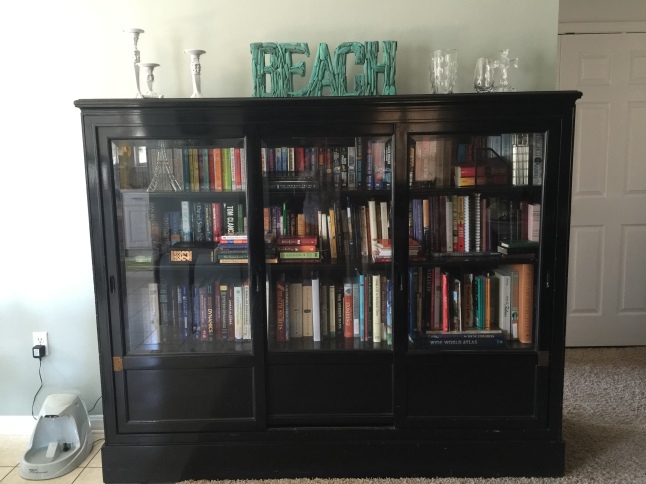
Yep, we painted the walls again. This color is for keeps.  Note the FLOORS!
  2. I prefer floating sofas, but the piano will be floating instead. Sacrifices. At least the long, plain back of the sofa won’t be visible anymore. Plus, the cats like the back of the sofa for afternoon siestas, and I’m sure they’ll like the window seat effect.
  3. The desk receives some natural light but not too much, and is located where I can cook dinner on the stove and check email simultaneously. Stay tuned for more on this in a future post.
  4. The black bookcase leaves the dining room (score), but the dining table stays, which is ideal for grabbing seconds or dessert from the adjacent kitchen (double score). Keeping it real, people.IMG_3897
  5. The piano has enough ‘walkaround’ space to avoid stabbings and is now a featured furniture piece in our home, yet it feels more tucked away than it did before somehow.
  6. Best of all, the new arrangement creates room for a new “library nook,” complete with our black behemoth bookcase and a cozy chair with optional ottoman.  The piano bench can even be used for seating! Eventually, we may add our old coffee table for puzzles, games, etc., but right now, we are enjoying the openness.  We’ve always wanted a dedicated library, and this might be the best we can do for a long time. #bibliophiles

IMG_5451

And now, because it has taken us so long to accomplish #flooringmarathon2015 that the holiday season is upon us, I give you the Christmasy version of the new music/library nook so you can actually see the piano in its new location:

IMG_5509

Customized Jewelry Storage

Personal Service Announcement: If there is one project you should hire out, it is definitely installing wood plank tile in your whole house.  In case you are wondering, yep, we are still slowly tiling our whole house. Forty, no, fifty days? Times a hundred it would seem!

Anyway, that project isn’t going to be ready to share for another 300 days (it seems), so I thought I would share a quick DIY I did last Monday while Chris was working on his car and other people were complaining about Columbus.

For the last 15 years or so, I have had a very functional jewelry armoire (from Service Merchandise–remember those days?) that my parents gave me. However, our recent NYC-apartment-like living in a fraction of our house’s square footage has amplified the need to eliminate some furniture pieces that aren’t working quite as hard as others. Let’s be honest: Sleep is essential; jewelry is not. I realize this may sound like treason to some, but my engagement + wedding rings and a pair of pearl studs are just enough bling for me most days. Ergo, the bed is in; the armoire is out.

IMG_5253

A couple of years ago, my mom made the decision to sell her jewelry armoire (purchased at the same time as mine) in the interests of having more floor space, and she has never looked back.  I decided it was time to follow suit.

I’ve noticed a trend in open jewelry storage, but I’m not a fan for two main reasons: (1) dust (2) cats. If you cycle through all your necklaces on a regular basis, you probably don’t have to worry about dust settling on your jewelry, but I would…and dust mites really aren’t a great fashion statement. In addition, we have cats that like to play with shiny, dangling objects (and one that likes to try to eat them), so this is a no-go for us.

My mom has been using these stackable jewelry boxes from Bed, Bath, & Beyond that keep her jewelry dust-free, and I opted to do the same, with a DIY modification.

IMG_5243

The set of 3 stackable trays (a bit misleading because it is really 2 + a lid) is a better buy than the separate individual trays, but the set doesn’t come with the tray with the ring/stud holder that is the very best part of my jewelry armoire. Womp, womp, womp. Typical marketing/sales ploy. 

Rather than pay $20 for the add-on section at the same time, I chose to make my own, using leftover craft materials. I didn’t have anything comparable to the velvety lining on hand, so I grabbed some craft foam.

IMG_5245

I simply cut a piece of foam to match the width of the smallest compartment, then folded it accordion-style, with each fold being slightly less than the height of the compartment, about 1/2″ long.

IMG_5252

The accordion folds give it just enough tension to wedge into the existing compartment and hold itself without the need of any adhesive.  That’s right–NO ADHESIVE NEEDED. This means you can always take the foam back out. 🙂

IMG_5251

The folds also give it the sections needed for inserting rings and studs. I used tighter folds for the studs and looser folds for the rings, and both are working just fine.

IMG_5255

Eventually I may purchase the real deal (with a good coupon!), but for the 15 minutes it took and the $20 savings right now, it was a nice quick fix to tide me over until then!

Furniture Fridays: The Thrill of the Hunt

Over Labor Day weekend we cleared out our storage unit and brought all the furniture back to our home. Some pieces found homes on the newly tiled areas of the house, while the majority of pieces were unceremoniously stuffed into our front bedroom, now jokingly referred to as the Room of Requirement. #harrypotterfans

IMG_5125

Eventually, once the rest of our floors are finished, we’ll move some pieces back into the rest of the house. Others we hope to re-home via Craigslist and our neighborhood’s fall yard sale, as we really have too much furniture for our small home.

Perhaps this is why Chris was rather surprised when I brought home a new piece of furniture Friday. Crazy? Maybe, maybe not.

After nine years of marriage, we have amassed a collection of furniture, small and large, more and less useful. Although pieces with a smaller footprint are ideally sized for our home, we also need furniture with enough room to hold our belongings. Pieces that don’t serve a particularly useful purpose must go, whereas pieces like our behemoth of a black bookcase surprisingly must stay. #bibliophiles

IMG_4607

For awhile now, I’ve been looking for just the right piece of furniture to provide storage for our home “administration station.”  I’ve tried to use our existing furniture (and various combinations thereof) for this purpose to no avail, as our mail and papers usually end up piled up on various surfaces around the house. We pay our bills on time but procrastinate when it comes to all other things paper-related.

I’ve come to the realization that we suffer from three paper-oriented problems:

  1. Our administrative things do not fit in one location, and having to transfer them from one place to another adds an extra step to an already seemingly insurmountable task.  This is akin to people dropping coats in the floor instead of opening a closet door to hang them up. Most professional organizers recommend providing coat hooks instead, as it eliminates one extra step needed for task completion. But we have another problem…
  2. The equivalent of coat hooks when it comes to paperwork is keeping papers out in the open, such as in file sorters, stackable trays, etc., but seeing papers stresses me out, paralyzing me further and ensuring the piles will keep growing. But…
  3. Keeping files obscured in file cabinets or other closed containers means out of sight, out of mind. If we can’t see the papers, we don’t do anything with them either.

On a side note, isn’t interesting that our lack of action (allowing papers to pile up instead of dealing with them straight away) enables inanimate objects (stacks of papers) that are otherwise unable to act independently to wield power over us? By not going on the offensive against paperwork (aka procrastinating), we must always be on the defensive, perpetually fleeing from or fighting an inanimate object!   

So what’s a family to do?

Given three challenges, I thought that perhaps a singular, small, yet storage-rich piece of furniture dedicated to containing the disaster all in one location might improve matters a wee bit.  While running errands on Wednesday, I popped into a local consignment store and happened upon this treasure:

IMG_5179

At 48″ in length, it is well suited to our small space, but its drawers are deep and wide, providing sufficient storage for all of our things. I talked the salesperson into reducing the price and making a slight repair before bringing it home with me Friday. Before buying, I inspected the workmanship and the original furniture marker, which turns out to be John Widdicomb of Grand Rapids. Based on the particular label, our piece is from the 1940s–not exactly an antique but definitely vintage. Sometimes the thrill of the find is equal to the thrill of the hunt!

In the next post, I’ll explain how I plan to utilize this piece to improve our paper problem. As for now, Hermes has claimed it as his own.

HermesCat

Mista Lista: To Do/Ta Da List Summer in Review

Mista Lista is back by popular demand with a quarterly post on how the KaZoos are improving the ‘Zoo one bullet point at a time. Here’s the latest on the to do/ta da situation at the ‘Zoo:

Yard

Last Year                                                                                 This Year

IMG_3063IMG_4756

  • Moving gate latch to the inside of the backyard (Surprise! We discovered we did in fact have a gate latch already, but it was put on the outside to allow free access to our backyard to any interested parties…what-tha-what?)  We now realize how the neighbors were able to show other interested buyers the backyard while we were looking at the inside with our realtor!) (1)
  • Cut down imposing magnolia in side yard (2)
  • Trim trees, shrubs, and grasses (2)
  • Remove sago palms in the way of mowing (2)
  • Replace rotted fence board (2)
  • Test/correct sprinkler aim (2)
  • Clear easement behind fence to keep weeds out of our yard (2)
  • Remove overgrown (ugly) hedges and grasses and snakes, oh my! (2)
  • Remove scalloped landscape edging (3)
  • Add new plants, mulch, and edging (3)
  • Replace odd flower bed between entry and driveway with brick pavers so that we aren’t stepping out of our car into the flower/weed bed (2)
  • Cut down magnolias in backyard (3)
  • Paint faded mailbox (2)
  • Shadowbox wood fence (3)
  • Line fence with crape myrtles for low maintenance privacy and shade (3)
  • Add edible plants! (3)
  • Upgrade fence (4)
  • Add gate on garage side for convenience (4)
  • Add sunporch? (4)
  • Add pool? (4)

Paved Areas, Garage, and Attic

Last Year /This Year (not much change here!)

IMG_3065

  • Fix garage door keyless entry that cannot be reset/changed for some reason (1)
  • Install paddleboard storage to get paddleboard out of the living room (2)
  • Install carpet squares for walking path around garage hazards (2)
  • Build garage racks for storage (2)
  • Uninstall wire shelving and cut to fit Master Bedroom Closet (2)
  • Pressure wash driveway, front sidewalk, and back patio (2)
  • Patch cracked concrete (2)
  • Fix attic stairs (2)
  • Find new home for plywood hurricane window covers to maximize floor space (3)
  • Organize garage shelves and floor areas so we can find things we need to knock out things on the to do list (2)
  • Install second paddle board rack for Amy’s new board (2)
  • Take out rest of yellowed sunbursts in garage door (so much better!) (2)
  • Install pegboard, hooks, etc.  for functional vertical storage (3)
  • Add floor to attic for functional storage (3)
  • Paint (3)

House Exterior

Last Year                                                                                 This Year

IMG_3064IMG_4758

  • Change locks (1)
  • Make key copies (1)
  • New wind standard roof (1)
  • Replace weather stripping on back door (2)
  • Remove corrosion from back door (2)
  • Add storm door (3)
  • Buy hurricane shutters to replace plywood (3)
  • Repaint house numbers (2)
  • Replace front door (4)
  • Replace garage door with wind standard garage door (4)

House Interior

Last Year/This Year (not much changed here)

IMG_3066

  • Install new smoke detector batteries (1)
  • Change air filter (1)
  • Install Nest thermostat (2)
  • Install carbon monoxide detector (2)
  • Recaulk windows (2)
  • Install reverse osmosis system (2)
  • Replace windows with energy efficient windows (3)
  • Color correct light fixtures and door knobs (4)
  • Replace cracked/Color correct faceplates/sockets/switches (4)

Foyer, Hallways, and Linen Closet

Last Year                                                                                 This Year

IMG_3052

  • Tear out carpet and vinyl tile (1)
  • Scrape ceiling (3)
  • Paint walls and trim (3)
  • Upgrade flooring to wood-look tile (3)
  • Redesign guest linen closet to function as coat closet (we have two linen closets but no coat closet!) (3)
  • Wainscoting, beadboard, board/batten in foyer (some sort of special wall treatment) (4)

Front Bedroom (Guest Bedroom)

Last Year                                                                                 This Year

IMG_3045

  • Buy wooden dowel to “lock” broken window (1)
  • Tear out carpet (1)
  • Scrape popcorn ceiling (1)
  • Prime and paint ceiling (1)
  • Prime walls/trim (1)
  • Install MBR ceiling fan so there is a light source and air circulation (this room gets stuffy!) (1)
  • Remove hideous wood-look blinds (1)
  • Install curtain rod (2)
  • Paint walls/trim (1)
  • Install wood-look tile (3)
  • Upgrade shelving in closet (4)

Guest/Hall Bathroom

Last Year                                                                                 This Year

IMG_3049

  • Paint walls/trim (3)
  • Replace toilet (3)
  • Replace shower head (3)
  • Replace sink hardware (3)
  • Replace vinyl tile floors with wood-look tile (3)
  • Replace lighting (4)
  • Frame out mirror (4)
  • Replace vanity/countertop (4)
  • Replace molded shower/tub combo with tub/shower with tiled walls (4)

Side Bedroom/Craft Room/Future Nursery

Last Year                                                                                 This Year

IMG_3051

  • Tear out carpet (1)
  • Remove hideous wood-look blinds (2)
  • Install curtain rod (2)
  • Install ceiling fan (2)
  • Replace ceiling (2)
  • Paint walls/trim (3)
  • Install wood-look tile (3)
  • Upgrade shelving in closet (4)

Living Room

Last Year                                                                                 This Year

IMG_3059

  • Tear out carpet (1)
  • Remove hideous wood-look blinds (2)
  • Install curtain rod (2)
  • Paint walls/trim (3)
  • Replace carpet with wood-look tile (3)
  • Take out existing ceiling fan (for bedroom 3) and replace with awesome fan (3)
  • Fix gas fireplace (4)
  • Apply new ceiling or plank the big wall (or both?) #shiplap (4)

Dining Area

Last Year                                                                                 This Year

IMG_3061

  • Remove hideous wood-look blinds (2)
  • Install curtain rods (2)
  • Paint walls/trim (3)
  • Replace light fixture (3)
  • Replace vinyl tile with wood look tile (3)
  • Install built-ins for china storage/buffet serving area (4)
  • Apply new ceiling or plank the big wall (or both)? #shiplap  (4)

Kitchen 

Last Year                                                                                 This Year

IMG_3062

  • Install our refrigerator (2)
  • Upgrade to gas range so normal family cooking can occur (2)
  • Remove hideous wood-look blinds (2)
  • Install curtain rod (2)
  • Upgrade range hood to functional one vented outside (instead of recirculating) (2)
  • Add electrical outlet for gas range behind it (currently having to plug it into a counter height wall outlet to the left of the range, maxing out the length of the electrical cord-ugh!) (2)
  • Upgrade dishwasher (3)
  • Paint walls/trim (3)
  • Replace light fixtures (3)
  • Reconfigure island (3)
  • Move refrigerator to where panty is and put new awesome pantry where fridge currently is for more functional layout (right now we can barely open our fridge door against the wall) (3)
  • Replace vinyl floors with wood look tile (3)
  • Install wood cabinets (4)
  • Install new countertops (4)
  • Install new sink and smart faucet (4)
  • Install tile backsplash (4)
  • Upgrade pantry to be cabinet pull-outs instead of wire shelves (4)

Laundry Closet

Last Year                                                                                 This Year

IMG_3054

  • Install our washer and dryer (2)
  • Paint walls/trim (3)
  • Add a laundry cart for better use of space! (3)
  • Replace vinyl tile with wood look tile (3)
  • Upgrade shelving (3)
  • Install countertop for enhanced folding (4)

Master Bedroom & Master Closet

Last Year                                                                                 This Year

IMG_3057

  • Tear out carpet (1)
  • Replace ceiling fan with awesome fan (2)
  • Remove hideous wood-look blinds (2)
  • Install curtain rods (2)
  • Scrape ceiling (3)
  • Paint walls/trim (3)
  • Change closet configuration to allow for two levels of hanging (using extra shelving from garage) (3)
  • Replace carpet with wood look tile (3)
  • Upgrade shelving in closet to non-wire rack closet system (4)
  • Build out coffered ceiling in MBR (4)

Master Bathroom 

Last Year                                                                                 This Year

IMG_3055

  • Paint walls/trim (3)
  • Replace toilet (3)
  • Replace shower head (3)
  • Install more towel rods and robe hooks (3)
  • Add double shower rod for more room in shower + hanging space for swimwear(3)
  • Replace vinyl tile floors with real tile (3)
  • Tear out awkward linen closet stealing space from vanity (3)
  • Tear out awkward doorway to toilet/tub/shower area (3)
  • Swap wimpy vanity and torn-out linen closet + dead space with master closet (4) MASSIVE RENO AHEAD!
  • Replace 1 old-person shallow tub/shower combo with 2 person tub (4)
  • Tile bath surround (4)
  • Plumb and install new vanity and shower in former master closet (4)
  • Install vanity mirror(s) (4)
  • Install better lighting (4)
  • Install new (non-leaking) sink hardware (4)

Mista Lista: They See Me Mowin’

Mista Lista’s changing things up at the ‘Zoo.  Each month, Mista Lista will be taking a closer look at one part of the ‘Zoo to see how things are shaping up. This month, Mista Lista is checking on things in the yard.

Front Yard

Our goals in the front yard were fairly simple: Take out overgrown landscaping and disintegrating edging; replace with new landscaping and new edging. We didn’t take a close up of the front flower bed when we bought the house, but it was primarily a thick row of overgrown grass with a few snake inhabitants. We tore out most of the grass and replaced it with a white climbing rose, hydrangeas, hostas, and a few flowering plants, primarily mums.  After a year, everything is thriving, and we even had to widen the bed to make room for our hostas.  I’m probably going to have to divide them next year, and my neighbor is planning to give me some of her divided hostas, too, which will mean even more hostas.  Yay! I just love hydrangeas and hostas together, though this year our hydrangeas bloomed pink instead of blue.  I love the deep purple-blue, but the pink were a nice change. I envision pink in the front near the house (near the foundation it will be a tough battle to maintain the right soil ph for blue) and blue in the back along the new white fence.  We’ll see.

Last Year                                                                                 This Year

IMG_3063IMG_4756

 Side Yard

Yes, we have two side yards, but only one is pictured.  The other one hasn’t changed much. Our west side yard was the priority, primarily because of the magnolia looming over our house (the roots were too close to the house foundation to be safe) as well as the other overgrown shrubs. We replaced them with a variety of plants including knockout roses, loropetalum, canna lilies, caladiums, purple fountain grass, and monkey grass. Everything has grown so quickly that is hard to believe it’s only been a year since these were planted. The pavers and the pine straw that our neighbors had spread on our yard have now been replaced with flourishing grass.  

                                 Last Year                                                                                 This Year

Westyard IMG_5042

Back Yard

The backyard has also changed dramatically.  Again, our goals were primarily to take out overgrown and ill-placed shrubs and trees, and down the road, replace the fence.  We added more flowerbeds, filled with canna lilies, lantanas, banana trees, roses, etc. We also tried a fruit/vegetable garden this year (mostly not a win), and started replacing the fence.  After buying a new outdoor area rug and some lawn furniture, we actually had people over for a cookout, with enough seats for all.  Yay!

Last Year                                                                                 This Year

BackYard1 IMG_4610

Overall, here’s what’s been accomplished thus far:

  • Moving gate latch to the inside of the backyard (Surprise! We discovered we did in fact have a gate latch already, but it was put on the outside to allow free access to our backyard to any interested parties…what-tha-what?)  We now realize how the neighbors were able to show other interested buyers the backyard while we were looking at the inside with our realtor!) (1)
  • Cut down imposing magnolia in side yard (2)
  • Trim trees, shrubs, and grasses (2)
  • Remove sago palms in the way of mowing (2)
  • Replace rotted fence board (2)
  • Test/correct sprinkler aim (2)
  • Clear easement behind fence to keep weeds out of our yard (2)
  • Remove overgrown (ugly) hedges and grasses and snakes, oh my! (2)
  • Remove scalloped landscape edging (3)
  • Add new plants, mulch, and edging (3)
  • Replace odd flower bed between entry and driveway with brick pavers so that we aren’t stepping out of our car into the flower/weed bed (2)
  • Cut down magnolias in backyard (3)
  • Paint faded mailbox (2)
  • Shadowbox wood fence (3)
  • Line fence with crape myrtles for low maintenance privacy and shade (3)
  • Add edible plants! (3)
  • Upgrade fence (4)
  • More patio furniture for people to be able to join us in our back yard (3)
  • Expand patio area (4)
  • Add gate on garage side for convenience (4)
  • Add sunporch? (4)
  • Add pool? (4)

Staying on top of things with the yard hasn’t been the easiest during our flooring project. We are constantly battling the weeds in the back, so we are brainstorming solutions for keeping them out more easily (that don’t involve lots of toxic chemicals!).  We also hope to finish the fencing and rearrange some plants in September to give them time to get established in their new homes before cooler weather arrives.  Ah, so many projects, so little time.

Demolition Diaries: A Cat’s Eye View of DIY

It’s official: The humans have gone completely mad, and we’re fed up. As if it weren’t bad enough that they took away all the soft things (and most of the hard things, too!) and shoved us into the smallest room crammed full of what’s left, we’ve had to deal with the WORST…Oh, did we forget to introduce ourselves? Forgive us. In case you haven’t read this page where the humans briefly mention us (before going ON and ON about themselves), we’re Cleopatra and Hermes, the resident felines.IMG_4867

I (Cleo) am the seal point Siamese wisely choosing the soft bed, and Hermes is the flame point Himalayan who prefers the cool concrete. We have our differences but have decided to unite together in a mission to restore order and comfort to our home.  We miss the lazy Saturday mornings spent in the humans’ bed. WE MUST TAKE IT BACK.

IMG_4740

Anyway, we’ve temporarily taken over this machine the people use to communicate with other humans to express our disdain for this incessant need they have to ruin our lives ALL. THE TIME. Okay, so maybe not all of the time–just lately.  Just when things were getting to a semi-normal state around here, we were locked up, and when they let us out again, ALL THE THINGS were gone.  We don’t know why they felt compelled to get rid of all the nice things.  I mean sure, we might have used that thing they call a “loveseat” for a scratching post, and we might have used the table as a runaway/launchpad for sailing onto the bookcase, but we didn’t think the scratch marks were that bad. Clearly they don’t understand the important of nail care and exercise.

IMG_4607

Then, they locked us up AGAIN. When we emerged the second time from our confinement, they had ripped up ALL THE FLOORS. Oh, sure, that carpet was NASTY…in fact we wouldn’t even lie on it, but it sure was fun to shred! Well, except for the edges where those sharp metal teeth were.  Okay, maybe tearing up the floors was a good idea.  I mean, we really got it started for them, so it was probably pretty easy work.

But the NEXT time they locked us up was the worst. Oh, the torture. The agony! There were horrible noises like a thousand metal hyenas howling. We buried our heads in our beds to no avail. The female human stayed with us and covered her ears, too, so the culprit must have been the male. He’s usually the quieter of the two, so we were surprised that he could even make such noises. When he peeked in the door to check on us, he was covered in white dust. We can’t imagine why he would want to be so dirty. Ugh. Completely shameful. Humans clearly do not understand good hygiene.  The dust was everywhere, too, and if the female hadn’t kept us in our room, we would have choked to death.  Maybe the confinement was for our own good….

After that, they locked us up again (starting to understand our frustration yet?), and when we emerged from our third round of imprisonment, half of the house was covered in this weird orange plastic carpet.  Big Foot (Hermes) hasn’t minded it, but I (Cleo) am not really a fan–too hard on my dainty paws.  The only bright spot in all of this has been the fact that the once forbidden guest room has now been made available to us, and we get to gaze wistfully at all the mockingbirds in the front yard.IMG_4966

Recently, they’ve started putting these long, cool planks on top of the orange carpet. They are perfectly sized for one cat to recline on them.  Of course, it is completely annoying that they keep picking them back up and shuffling them around in some places.  Why not put more of them down on the orange stuff? Is it not clear what we prefer?

IMG_5008

Anyway, it’s been two months of this, and we’re sick of it.  We can’t remember the last time we had a fast and furious playtime with the green magic light that moves around or with the jingle balls and rattle mice.  I mean, it’s just not fun to play in a confined area. Seriously, people. What were you thinking? You’ve ruined EVERYTHING.

We don’t like to admit it, but we’ve resorted to some counter tactics to make our voices heard. Hermes, the more athletic of the two of us, easily hurdled their childproof gate, once he realized that he no longer fit between the bars.  Childproof–not cat proof, people.  Seriously.  After the gate breach, they put up some cardboard “doors” to block us from the rest of the house, but we shredded right through those.  Silly humans.  More recently, Hermes has taken to jumping on the keyboard and waking up this computer machine screen at 4:30 a.m. to ruin the people’s sleep. This also ruins my sleep. Kittens. Sheesh.IMG_5005
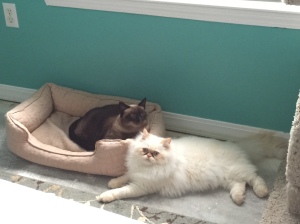
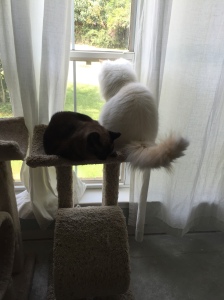
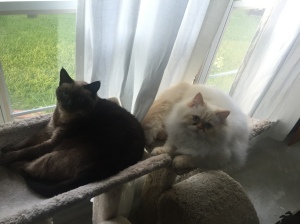
This practice works okay for the male, but the female just rolls over. She is immune to our night assaults.  Trouble is, the male banishes us to the other small room when Hermes does this, which means being relegated to the items they refer to as ‘pet beds’ and ‘cat condos’. Don’t they understand the importance of sharing when it comes to cohabitation? 

IMG_4950

This is a serious problem, and we must think of other ways to retaliate that don’t result in less comfortable quarters.  We’ve tried to play nice, but we are getting desperate, folks.  If you have any ideas, let us know in the comments below!

Prepare to be Floored

Last Thursday we made our most expensive home improvement purchase yet {gulp}….We finally ordered flooring for our whole house!  We talked about the porcelain wood plank tile we chose, Spice in the American Heritage Series by Marazzi (#3 in the pic), here.

IMG_4472We have a couple of weeks between now and the delivery date, so we will be spending that time prepping the rest of our house for flooring. This involves the following exciting (and overwhelming) activities, some of which we started last year, here,  

IMG_2642

and the rest that we will be tackling this week:

  • renting storage unit to store garage things and furniture so that we have room for 1850 square feet of 6 x 36 wood look porcelain tile coming on 4 pallets (and can move furniture out in sections to prep floors and lay tile) (did this Tues)
  • moving garage things and furniture to said storage unit (Wed-Thurs)
  • removing baseboards and shoe moulding (carefully) (Fri)
  • ripping up carpet, carpet pads, tack strips and hauling to curb for pick up (Thurs-Fri)
  • renting PRO scraper from Big Orange and scraping up vinyl tiles, glue, and paint and hauling to curb for pick up (Sat)
  • patching holes and cracks in concrete, sanding, cleaning, and flattening where needed
  • purchasing and installing DITRA (maybe/maybe not) Update: We are definitely going with DITRA!
  • purchasing DITRAset and other supplies as needed (trowels, etc.)
  • snapping chalk lines to form grid and dry-fitting tile
  • purchasing a commercial wet saw (none for rent in our area are large enough to rip 36″ tile) [if needed, based on our dry-fit]
  • pre-cutting tile

Fun times, right? Or crazy times.  Getting ALLLLLL this done in two weeks while working should be interesting. Oh, and we have a fence to finish, too. If you want to track our progress in more real time, check us out on Instagram: @kazoopartyoftwo

Here goes nothing!

Furniture Fridays: Back in Black!

We’re back in black, baby.  Or rather, the bookcase is.  About a month ago, we mentioned the idea of painting this antique bookcase with Annie Sloan Chalk Paint, here:

IMG_4428

At the time, we had no idea whether or not the current  coat of black lacquer contained lead, which was problematic because it was chipping…and our cats like to scratch against it (and recline on the top, looking down on all of us lesser mortals with disdain, pity, or something).  Our plan was to check for lead, and if we had lead, proceed with abatement and painting ASAP since we will be moving the furniture for floor demo and installation anyway.

Recently, at Sherwin Williams’ 40% off sale in April, I picked up a lead paint test kit. After both of us returned from our various work-related travels that have consumed most of May, we tested our bookcase for lead.  With our kit, you were supposed to squeeze and crush a vial containing a reagent that when rubbed against the potentially lead containing surface for 30 seconds would turn pink/red for lead.  The kit also included a false negative test patch so that if you had a negative result you could double check that the vial was not faulty.  Of course, the test patch has to contain lead for the false negative test to be valid, so following all precautions was essential to minimize exposure to hazardous materials. Chris performed the test, while I hovered over him to make sure he did it correctly observed at a safe distance.

We are excited to report that we are lead-free, baby! Now we don’t have to worry about fur babies ingesting lead from the chipping paint and can take our time deciding what to do paint-wise. We also now have the possibility of being able to strip the bookcase down and restore it to its original beauty, which we are also considering.  Another decision delayed, at least for a little while.  Plus, we won’t have to start another DIY project while trying to fence, paint, and tear up floors. Whew! For now, our bookcase is going to stay black, and we’re okay with that.

IMG_4607

Happy Friday, folks!