In last week’s great purge of our master bedroom closet, we cleared out our closet in order to scrape ceilings, paint walls, rip out carpet, and add more racks for storage, using leftover wire shelving from our garage that we took down to make room for paddle board racks. Chris also attempted to put on pants from high school. Spoiler alert: They didn’t fit.
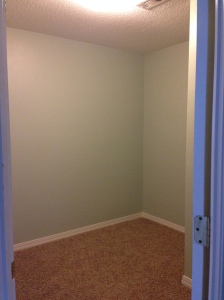
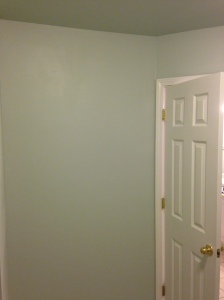
We painted the walls before doing anything else (usually we wouldn’t), primarily because the taller KaZoo was on work-related travel, and the shorter KaZoo couldn’t reach the ceiling well enough to handle the scrape, patch, sand, prime, and paint all by herself. When Mr. KaZoo left, the closet looked like this:

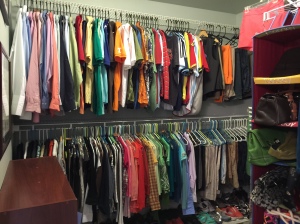
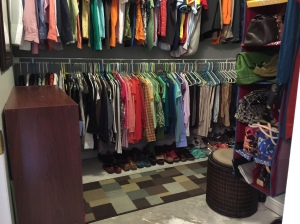
When he returned, he found the closet looking like this:
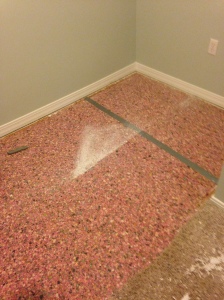
Then we combined forces to tackle the ceiling. Our usual prepwork involves removing the carpet, tarping off things we don’t want covered in dust, and then scraping the ceiling, but this time, we used the carpet as a floor tarp to catch all of the popcorn debris raining down since the carpet was going to be leaving anyway. I don’t recommend this unless you like slogging through a sea of popcorn ceiling and shag carpet while covered in drywall dust. We first tried the dry-method of popcorn removal–simply scraping away at it. Although this method resulted in fewer scratches and fuzzy places in the drywall, it was also considerably more tedious than the wet method we have used in the past. We normally use one of those garden sprayers, but ours had recently been used for weed killer, so we just used a regular spray bottle filled with water to mist the ceiling, rather than gassing ourselves in the closet. After waiting a few minutes for the water to saturate the popcorn, it came off in nice, soggy strips, rather than little chippy dry sections.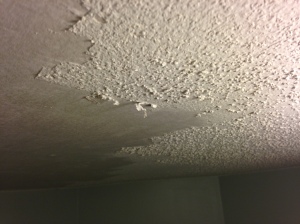
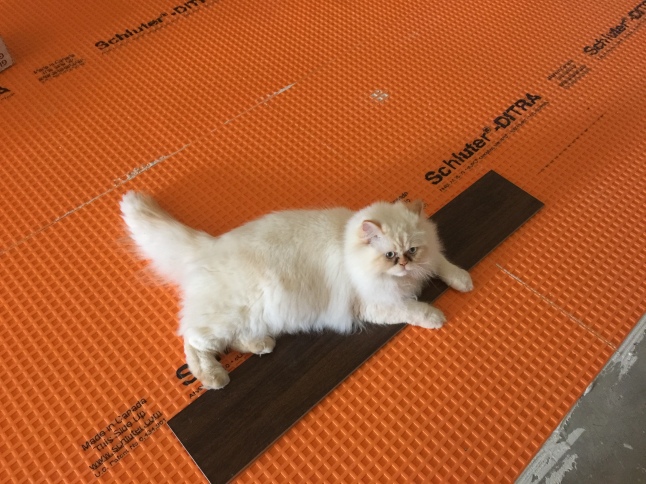
We brushed everything down to get rid of residual dust on the ceiling surface, applied joint compound to areas needing to be smoother, and let that dry overnight. The next day, we sanded, brushed, and sponged everything down (again), after which we ripped out the carpet.
After vacuuming up the residual dust and debris, we were ready to paint the ceiling. We decided to paint the ceiling the same color as the walls (Sherwin Williams Sea Salt) for three reasons (a) We have plenty of it. (b) It is not the typical white. (c) It is light enough to not make the closet feel like it is caving in on us while trying to find clothes in the morning.
While waiting for the painted ceiling to dry, we measured and cut the extra wire racks we removed from the garage to be the sizes we needed for the closet. Then we forged ahead to installing the racks. This was a tedious process that took the form of this cycle:
- Chris holds rack while Amy marks one spot for height and width of crevice between wires for wall bracket.
- Amy uses level to measure and mark all spots for back wall brackets and side brackets.
- Chris drills holes for all back and side brackets.
- Amy and Chris hammer in the anchors and nail-ish things (we like to use the technical language for things around here, in case you haven’t noticed). The instructions said to tap gently, but the long wall had extra plywood backing that meant we had to break out our steel-driving John Henry skills. We’re fairly certain we woke up the neighbor’s baby doing this, which means our neighbors probably had a great Friday night. Except not at all.
- Amy and Chris snap wire rack into place and set into side wall bracket.
- Chris adds C-clamps for maximum support, using a manual screwdriver. The directions said to use 1 1/2 inch screws. This was a total impossibility, and we ended up using 1 1/4 inch screws instead, with much more success.
- Amy holds support arm brackets in place while Chris drills holes, taps in anchor, and hammers in the nail-ish things.
- Repeat four times.
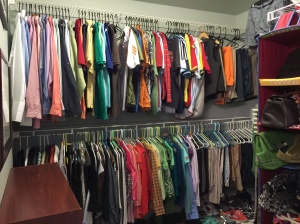
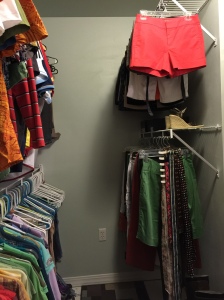
After installation of all the racks, I sponge-washed the walls to get rid of residual dust from the drilling and vacuumed the baseboards and floor. Once we installed the racks in their new location, the closet started looking less like a secret safe room and more like an actual closet. Of course, adding clothes back in the closet helped with that, too.
To plan the new location of our racks (and determine the measurements for our cuts), we inventoried how many categories of clothing items we had (i.e., how many skirts, pants, shirts, dresses, etc.) and decided where it would be best to hang the respective categories. We decided to do two long racks (keeping the existing long rack plus a new long rack cut from the garage shelving), one for each of us to hang our shirts and pants.
With the residual section of the garage rack, we made another short shelf/rack for my shorts and knee length skirts to hang opposite the long wall. We trimmed an existing closet rack to fit the same wall for my long skirts and capri pants.

We decided that a galley-like closet arrangement was more functional than the previous corner system that rendered part of each shelf useless for hanging items where they t-boned into each other. Plus, this provides easier access to the outlet and gives us a nice path for a runner rug. Not that room for a rug was a major part of our planning and decision making, but having a rug over the concrete floors (until we get our wood-look porcelain tile) definitely softens things up a bit underfoot.
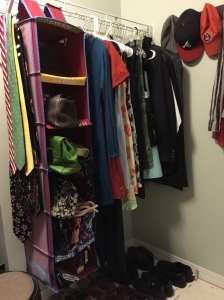
The mid-sized existing rack we raised a few inches to allow for long dress and suit storage for both of us, storage for my purses, and room for Chris’s shoes.
While cutting the shelving, Chris noticed that the garage wire racks weren’t the same kind of rack as the ones already in our closet: They didn’t have the clothing “bar” at the bottom. Aesthetically, we thought it may not look the best, but after install, it is barely noticeable and is actually a functional improvement in some ways because the divided sections keep you from cramming too many clothes in one location.. Plus, if we upgrade to a real closet system down the road, we only have to live with the mismatch for awhile. Given my perfectionistic, OCD tendencies, I really thought it would bother me more than it does. Maybe I’m too short to really see the top rack, so I don’t notice the difference.
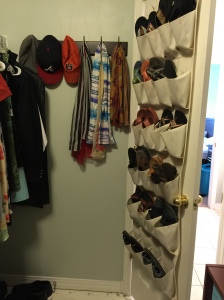
I hung my flip-flop shoe organizer back over the door, and we mounted our coat rack behind the door to hold hats and scarves.
On the left wall (as you enter the closet), we brought the 3 x 3 Cherry Cubeical back, which is currently holding my swimsuits, swimsuit cover ups, board shorts, work shorts, and work pants.
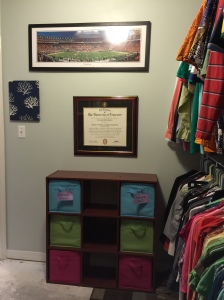
Note: The purple labels hanging on the blue handles differentiate my ocean swimsuits from my pool suits. This may seem ridiculous to some of you, but if you have ever had a home with a pool, this may make some sense to you. Basically, if you wear a swimsuit in the ocean and then wear it again to swim in a pool, you can introduce algae to that pool, and algae (especially some kinds) are hard to eliminate from a pool. If you wash your swimsuit in hot water every time you swim in the ocean before swimming in a pool to “kill” living organisms, there still may be some algae stuck to it (especially if you have a lined swimsuit), and your swimsuit may now be faded and ill-fitting. A simple rinse of your suit between ocean and pool or showering in your swimsuit between venues does not suffice. Since I frequent both the pool and the ocean, I handwash my suits after wearing them and choose to keep two different sets of suits to avoid the risk of contamination.
The middle sections of the Cubeical are currently empty (!), but I’m sure they’ll be filled soon, too. We also added some interest to the wall in the form of a pinboard with a coral motif, a panoramic photograph of Neyland Stadium, and Chris’s diploma (because where do you hang those if you don’t have a dedicated home office or man cave)? My diplomas aren’t framed, so they don’t get a place of honor in the closet like his does. Maybe someday I’ll get around to framing my first two diplomas. Probably about the time I frame my third and final one. Which could be never at the rate my dissertation is going.
Eventually we plan to upgrade the light fixture from its mushroom-like state, add the wood-look tile I mentioned earlier, and install a real closet system, perhaps with some additional shelf lighting to help with visibility. For now, our under $100 fix will work just fine.
Organizing Clothing:
For Chris’s clothes, organizing was simply a matter of hanging his shirts from dressy to casual, followed by his pants, also from dressy to casual. My clothes required a little more work, and I organized them in a slightly unconventional way. I typically sort by kind of article and keep like with like: dresses with dresses, shorts with shorts, etc. For shirts, I normally vacillate between organizing by color and by category (business casual, casual) as the primary category, followed by type (sleeveless, short sleeve, 3/4 sleeve, long sleeve). On the one hand, I like organizing by color because there is just something harmonious about color continuity that I prefer, but I keep wearing the same tops over and over because I know how to pair them with other things to make outfits, rendering much of my wardrobe useless. On the other hand, organizing by category shows me more options for particular occasions, thus increasing the likelihood I try wearing something different than usual, but walking into the closet is a visual jarring experience that makes selecting anything difficult. When re-doing this closet, I decided to analyze my clothing pitfalls and use that to come up with a happy medium.
I frequently find myself stuck in three kinds of clothing ruts: (1) I wear the same tops/outfits over and over. (2) I prefer casual to dressy. (3) I gravitate to neutrals. After having to conduct my dissertation research out of state and live in a hotel for six weeks, I re-learned the art of capsule wardrobes. I used to be good at this when traveling internationally. In high school, I took a small size carry-on for a month in Europe and laughed at all my friends lugging giant Samsonites up nine flights of stairs in Greece. I love the simplicity of capsule wardrobes. I am a minimalist at heart, so having a closet full of clothes overwhelms me with too many possibilities. Consequently, I’m planning to start cataloguing outfit ideas, beginning with my neutrals that I love. Rather than fighting my preference for neutrals, I’m going to use that as the starting point for developing my outfit building skills, essentially building a capsule wardrobe with neutrals as the base.
My neutrals are sorted into three categories: up, up/down, and down, a.k.a. classy, convertible, and comfortable. Up clothes are dressier and more likely to be considered businesswear in a traditional workplace setting. Items in this category are more likely to closely resemble menswear and/or have an element of elegance about them, such as being made of better material, adding a touch of lace or silk, or creating an interesting neckline or back. Clothes in this category have a certain feature that makes them seem classy.
I love gray, but I hate gray areas. The murky gray clothing area is what I call up/down wear, or clothing which can either dress up an outfit or dress it down. Clothes that could be considered business casual in a less formal work environment or in a trendier/artsy environment fall in this category. To qualify as an up/down top, the style and cut of shirt is likely based less on menswear and/or may be made of a material that makes it appear more casual. For example, the blouse on the left is an “up” blouse, but the one on the right is an “up/down” blouse because of the material and style. Note the sleeves of the blouse on the left are nicely cuffed, whereas the sleeves on the right blouse aren’t. I would wear up/down clothes when I’m wanting to appear put-together, but not necessarily needing to be “polished.” Here, the emphasis is on the versatility of the piece–can it be easily converted from work to play?
Down clothes are items like basic tees and polo shirts–anything that is decidedly more casual or sporty. That’s not to say I wouldn’t throw a blazer over a tee and turn it into a work outfit (my default, in fact), but the tee itself has a dressed down, at home, casual feel, where comfort is king. This is literally my comfort zone when it comes to clothes.
The rest of my tops are organized by color. Here at the coast, the weather is warm enough year round that having entire sections of my closet devoted to long sleeves is unnecessary, but because the air temperature can feel cool in the early mornings and evenings, even in summer, having access to all kinds of sleeves year round is essential. Consequently, I elected not to do the secondary sort I typically do by sleeve length.
We’ll see how “the best of both worlds” turns out.


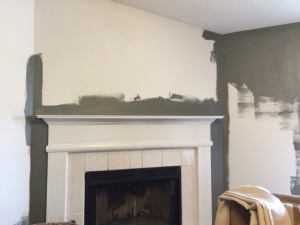
 until we painted the accent wall in the kitchen/dining area Drizzle. We also played with swapping some furniture around in the living room, foyer, and master bedroom, resulting in the antique buffet landing here for awhile. It looked great on this wall and especially nice with the Retreat color. Originally, the kitchen/dining accent wall was going to be a color from the same swatch as Retreat, Comfort Gray, and Sea Salt (all colors in the main living space) so that everything would coordinate nicely. Except it didn’t. Oyster Bay, the color that henceforth shall be The-Color-That-Shall-Not-Be-Named, was a no go for us. As we said

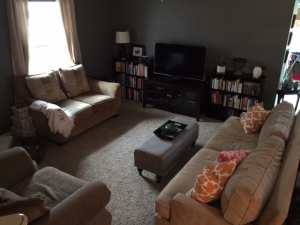
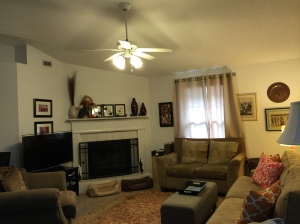
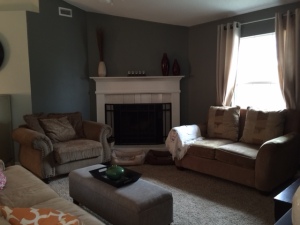 If you’ve seen some of our previous whole-house posts in the past, you may have noticed that our area rug has been taken up; it is headed to the master bedroom, as it barely fit this space anyway. Of course, now this means you can see the dingy carpet, but not for long! Part of the rush to get the rest of the house painted is because we are going to be doing an entire-house flooring project in June that we talked about

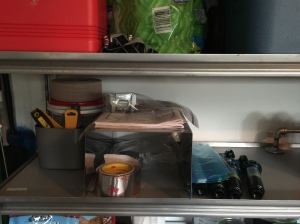
 Regardless of whether or not the story is true, it has character. And it is indeed solid. And industrial, but not in the expected way. As shown above, the glass panels slide to allow access to the shelves and also reveal drawers at the bottom. The glass panels are fitted so precisely that they only fit in one order of installation, and no hardware was used to hang them. This is the same way with the drawers–these drawers use ZERO hardware for mounting/sliding; instead they have an interesting wood sliding puzzle configuration allowing you to open them and take them out. We aren’t jumping on the brass bandwagon throughout our house like some people are, but the brass hardware on this bookcase looks so perfect with the glossy black coat. The brass plates on the sliding doors (differentiate left and right from center panels) have a bit of a patina, whereas the brass hardware on the drawers has been relatively well protected despite having lived in factories for generations. #brassisback


 Here’s the cost breakdown: